How to Train Star Jasmine to Climb a Fence (Espalier Made Easy!)

You know those Pinterest-worthy garden walls with vines growing in perfect patterns? That’s called espalier — and turns out, it’s way easier than it looks.
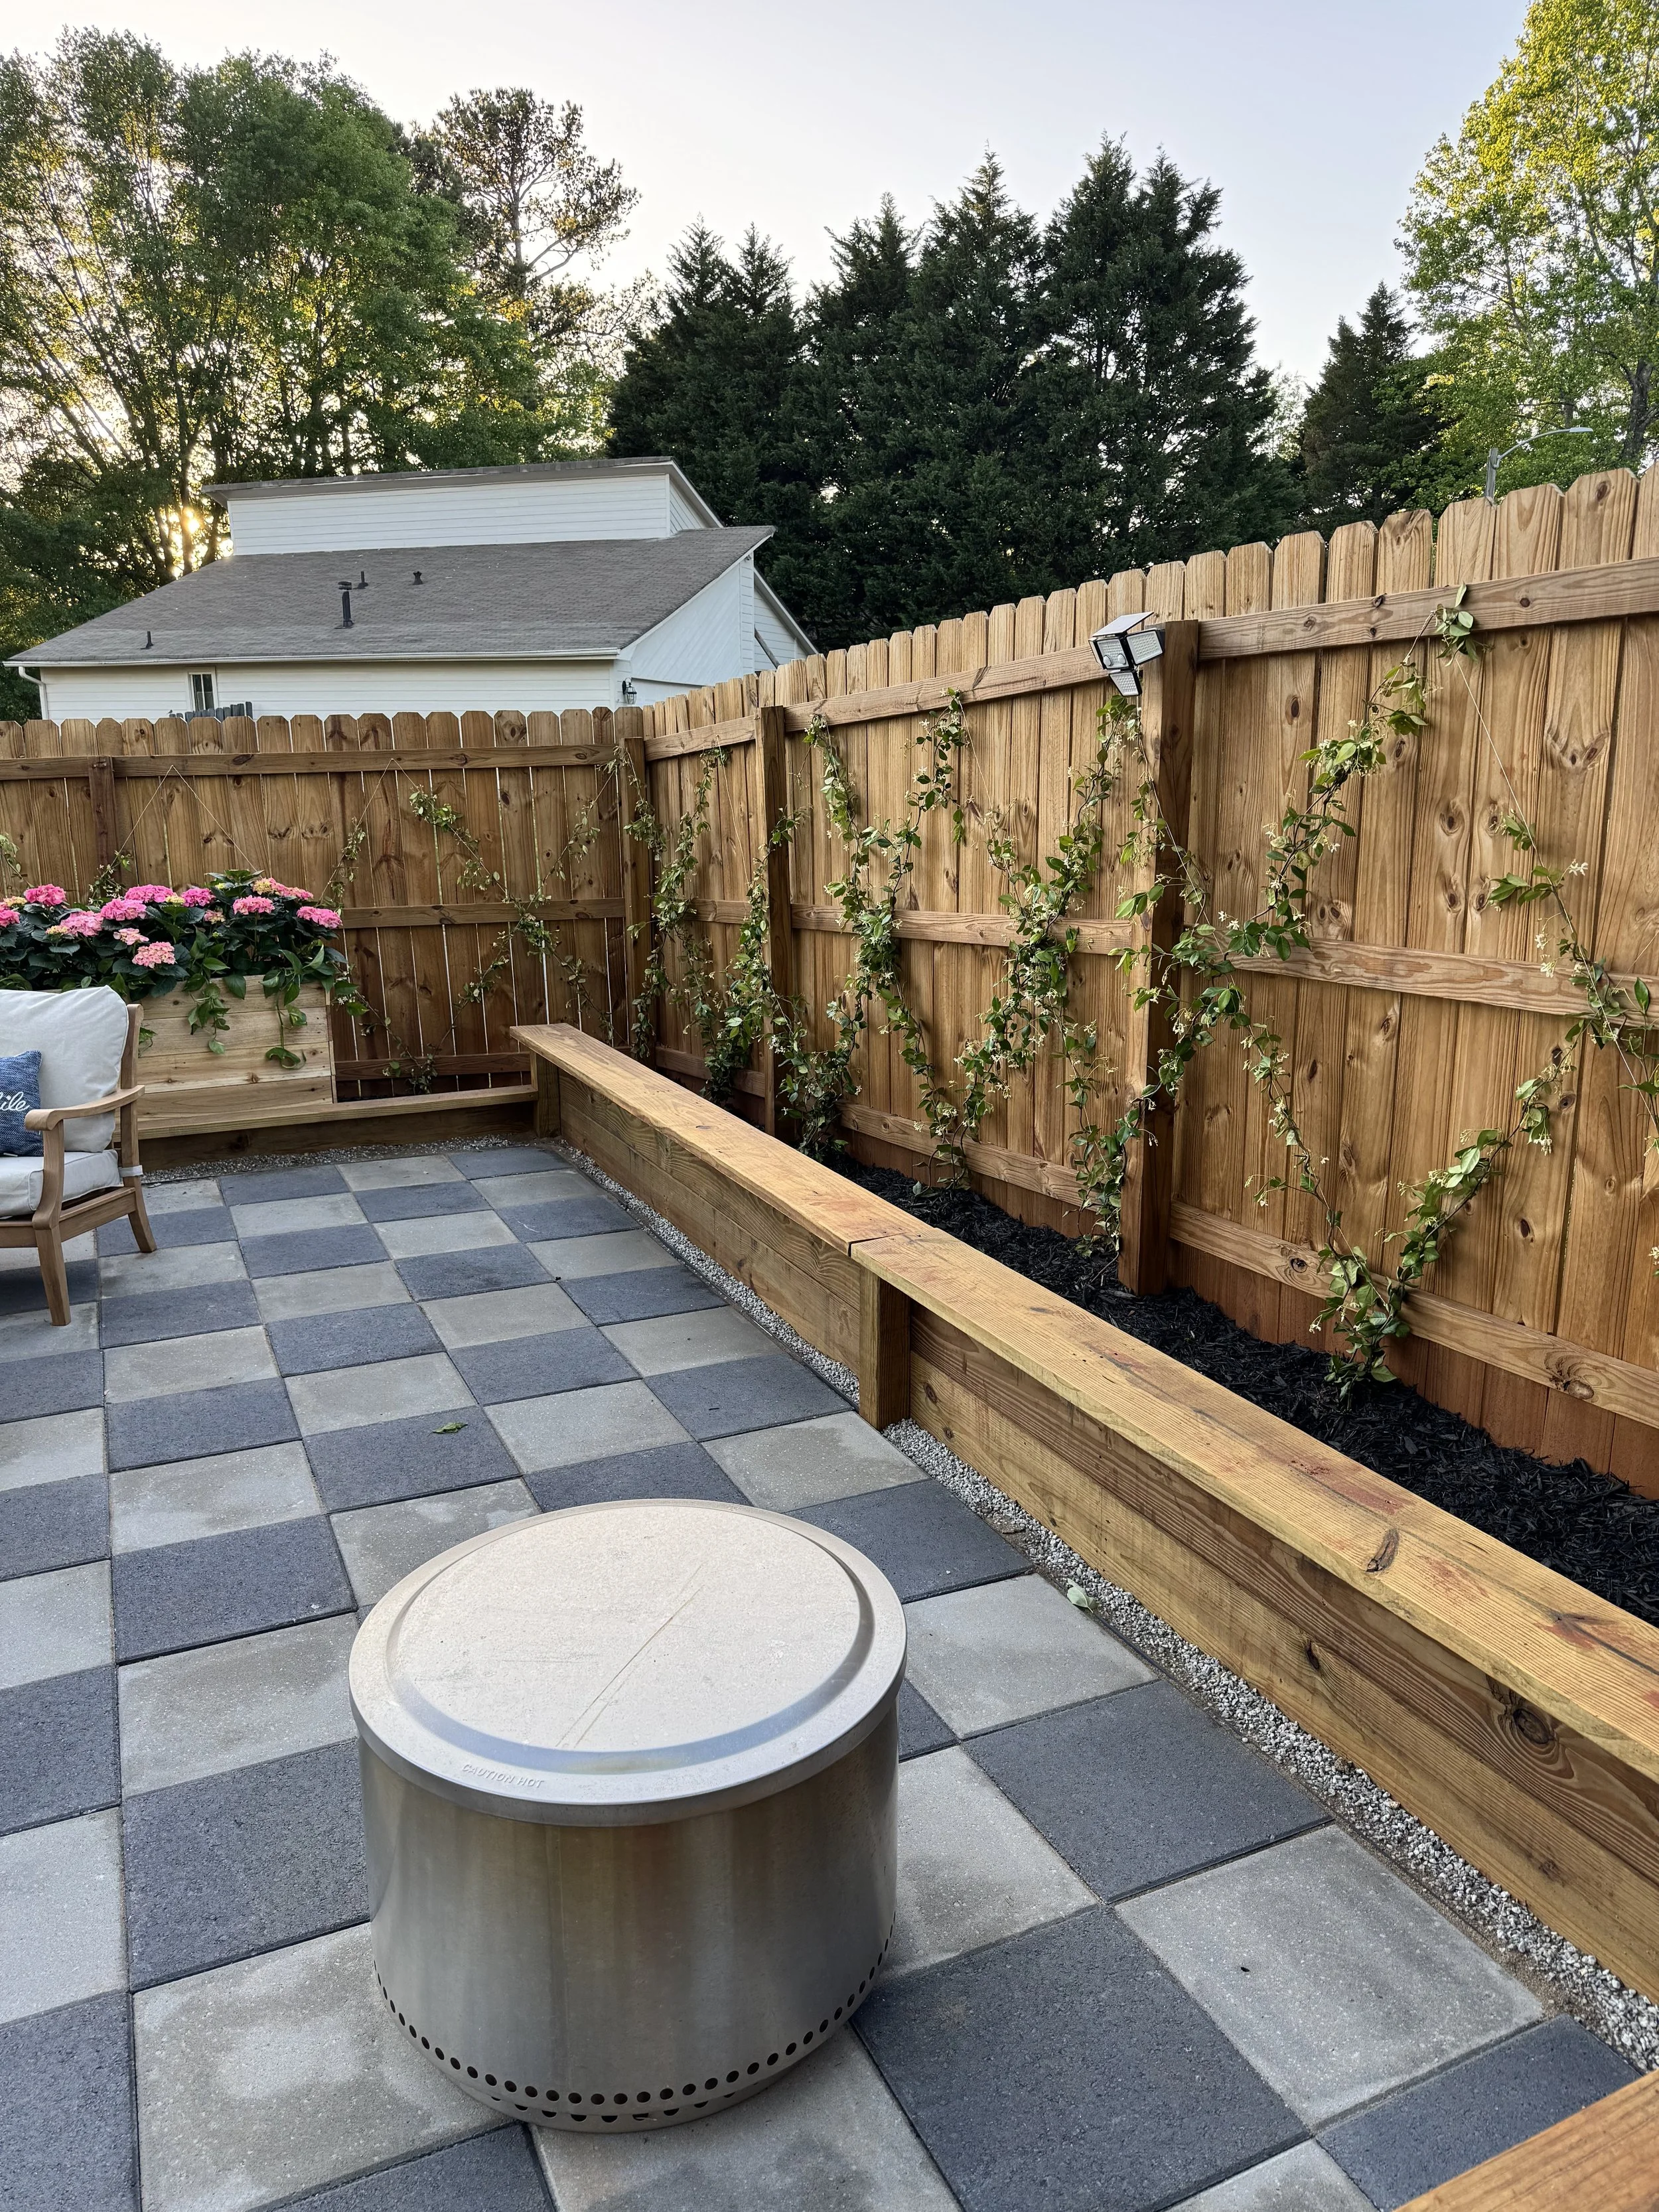
We had a plain fence in our backyard that was just begging for a little glow-up, and star jasmine was the perfect plant for the job. It smells incredible, grows fast, and with a few supplies, you can train it to grow in the prettiest crisscross pattern.
Here’s exactly how I did it, step-by-step.
Step 1: Decide Your Spacing

First, figure out how far apart you want each plant. I went with 3 feet between each one — it gives them plenty of room to grow without looking too spaced out.
To make life easier later, I grabbed a can of spray paint and marked a dot on the ground every 3 feet along the base of the fence. That way I knew exactly where to plant later on.
Step 2: Add Eyebolts to the Fence

Time to give your vines something to climb! I added eyebolts directly into the fence — one about 12" off the groundand another about 5 feet up.
Tip: Use a small drill bit to make a pilot hole first. Then screw the eyebolt in by hand — way easier than trying to force it into the wood.
Repeat that at every spray-painted spot so your wires will crisscross between each plant.
Step 3: String the Wire in an X Pattern
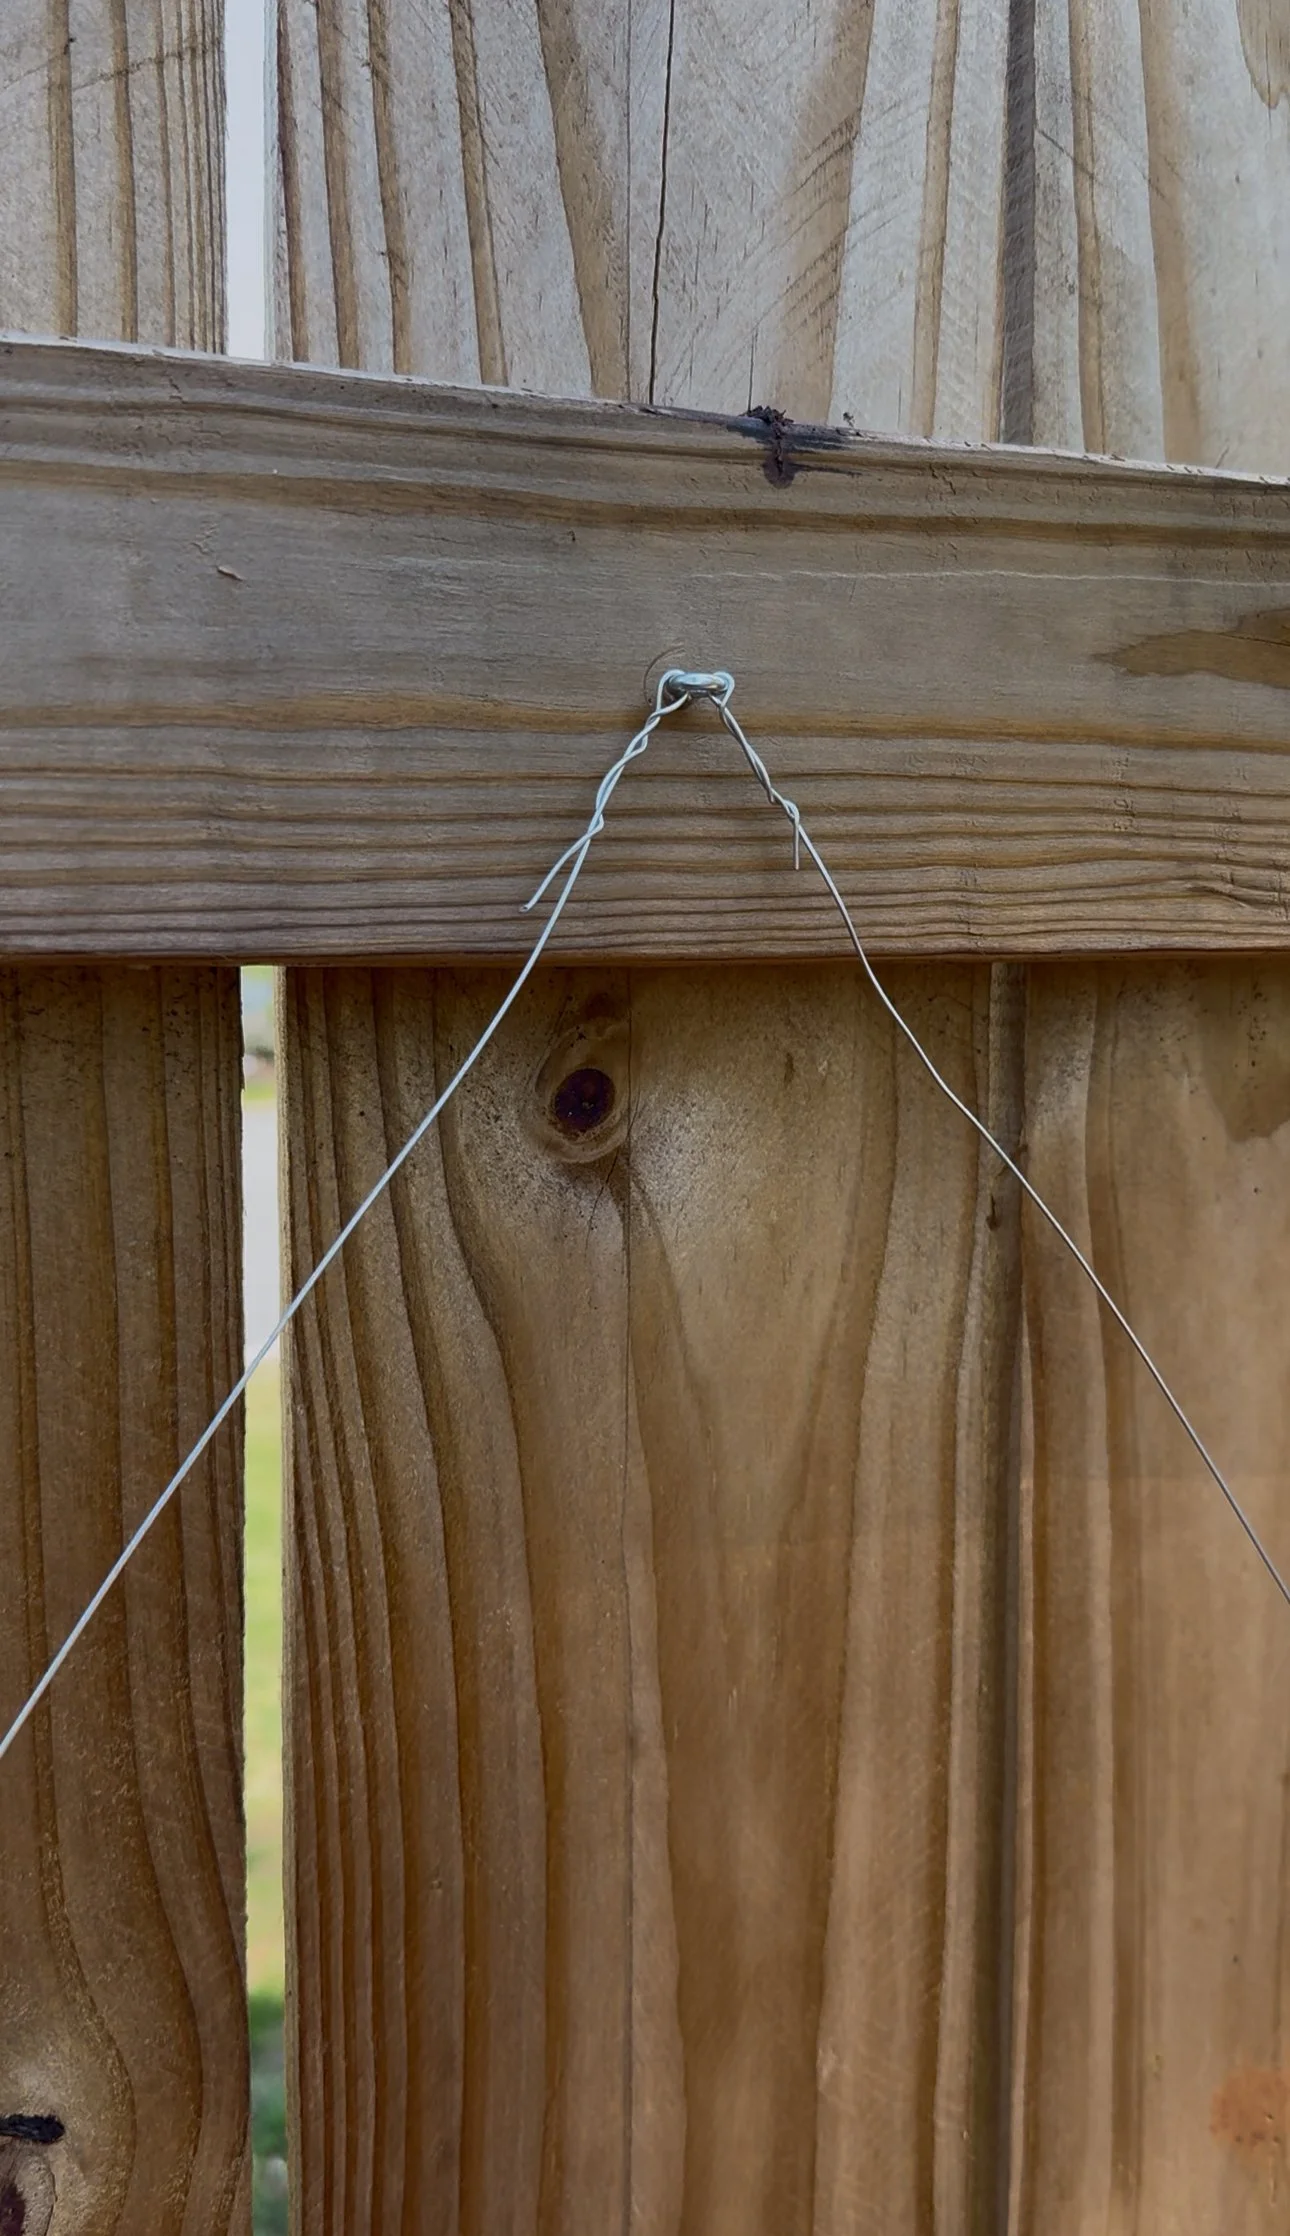
This part looks fancy...but it’s super simple. I used 20 gauge galvanized steel wire — it's strong, holds its shape, and doesn’t rust.
Here’s what to do:
Start at a lower eyebolt, thread your wire through, and twist it around itself to secure.
Pull the wire up diagonally to the higher eyebolt at the next post and thread it through.
Leave a few extra inches before cutting the wire so you can twist and secure it around itself again.
Repeat the process, going back and forth to create a big X pattern all the way down the fence.
Now you’ve got a beautiful framework ready for your jasmine to climb!
Step 4: Separate and Prep the Star Jasmine

The big jasmine containers I bought were full of healthy vines — and bonus: they could be split into three separate plants.
Just unwind the vines gently.
Split the root ball into even chunks — you’ll end up with more plants for the same price. (Yes, please!)
Step 5: Plant the Jasmine

Now it’s planting time!
Use a post hole digger (or shovel) to dig a hole about twice as wide and deep as your new jasmine root ball at each spray-painted spot.
Place the jasmine in, backfill with good topsoil, and gently press it down.
Easy peasy.
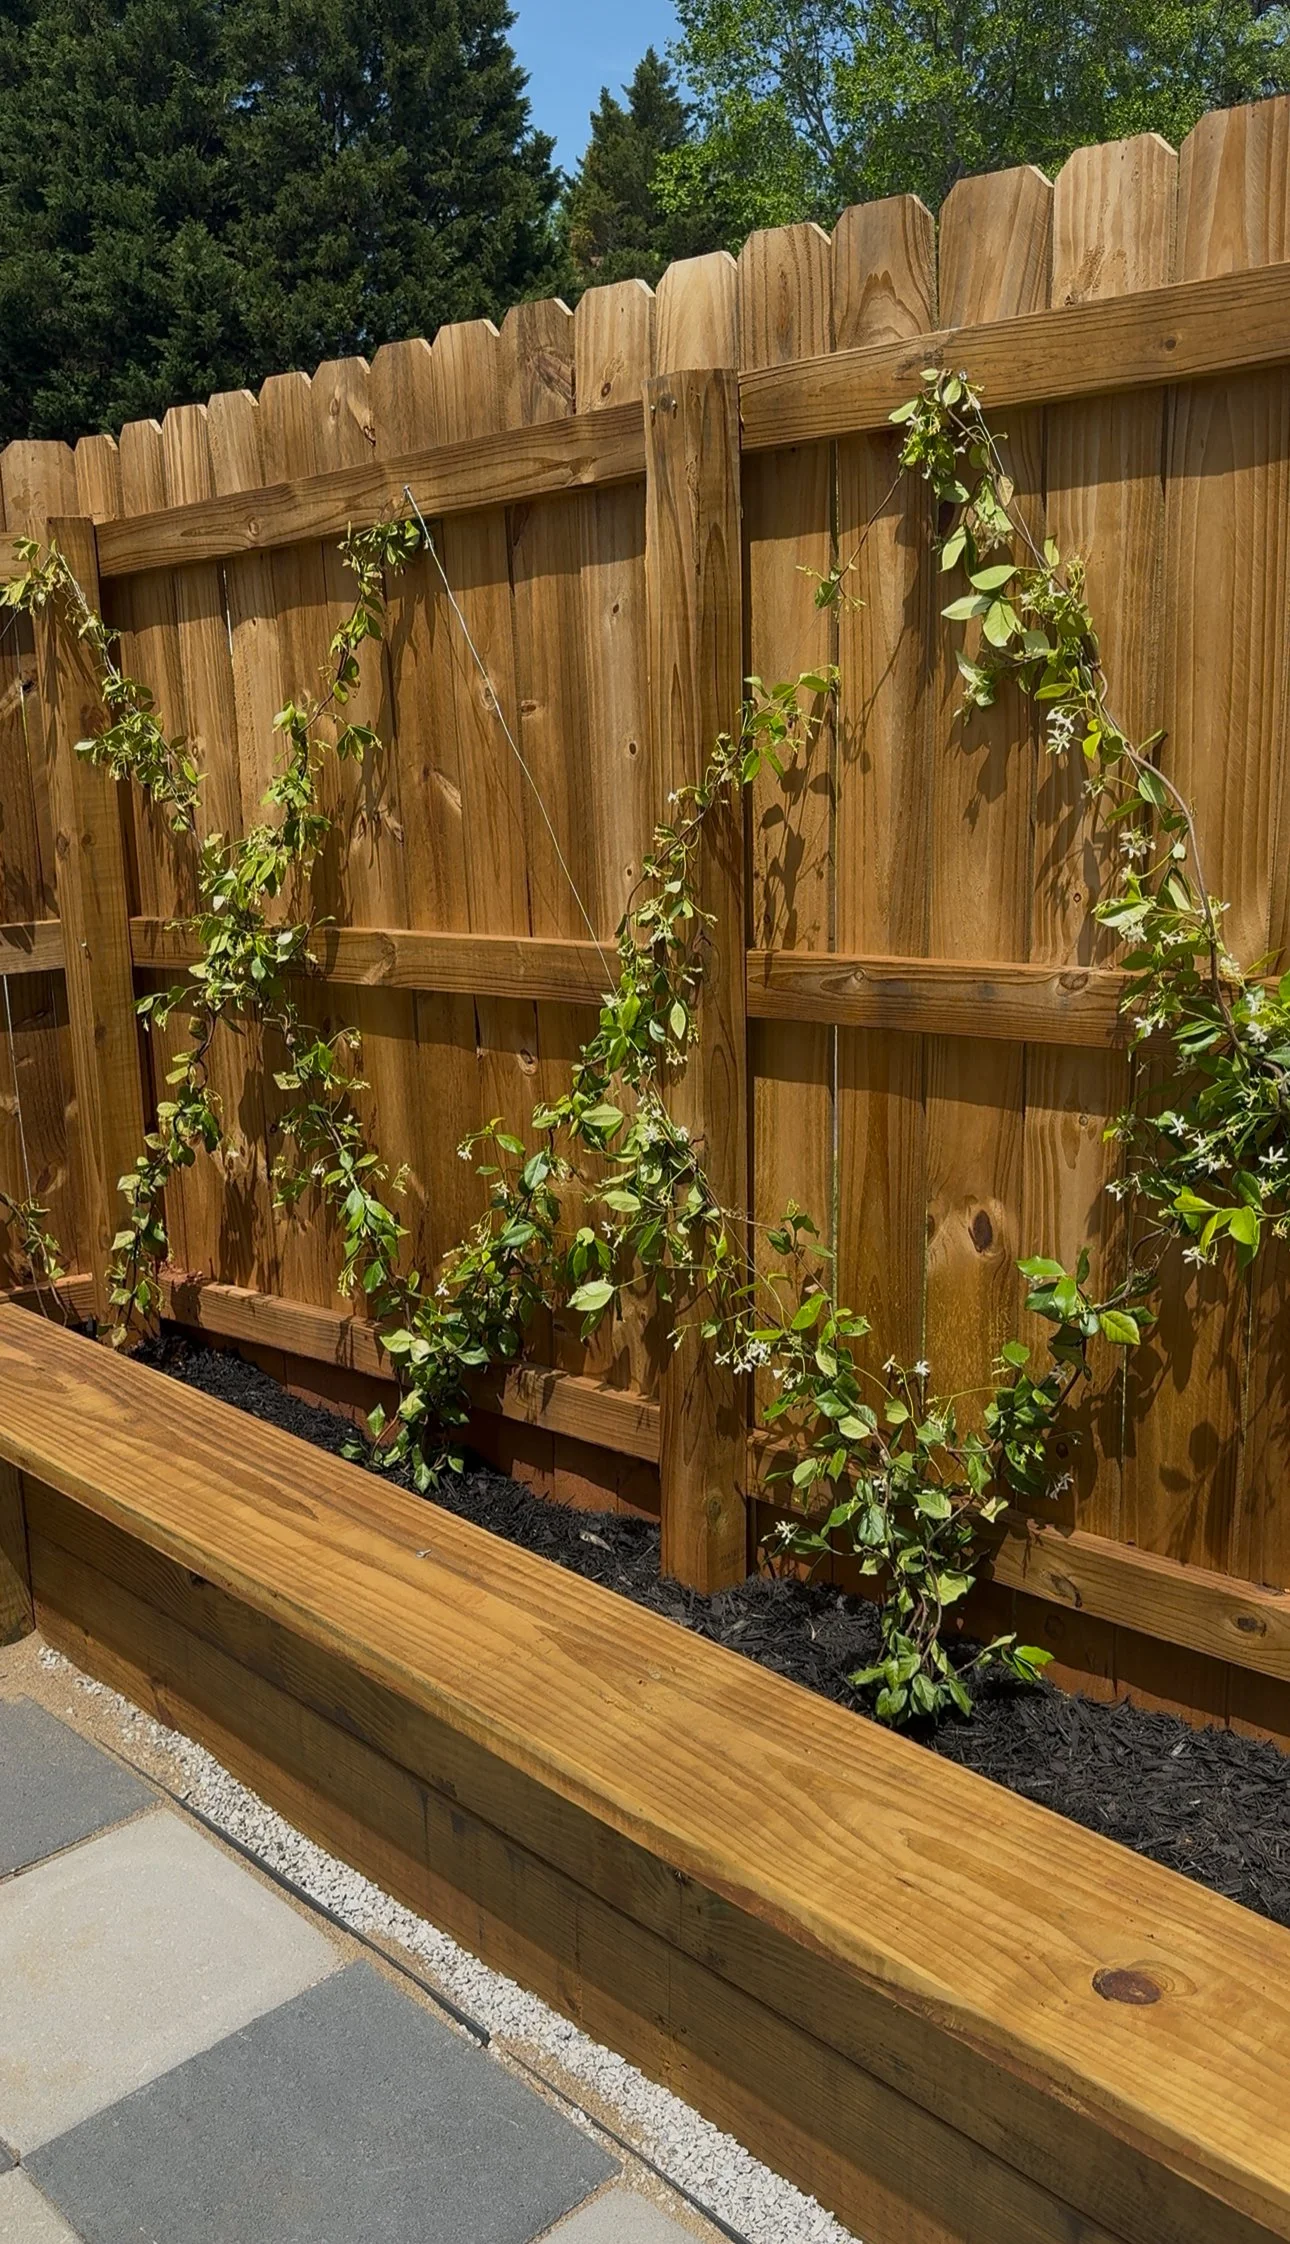
Step 6: Train the Vines Up the Wires

This is the fun part — and the most satisfying!
Grab the long vines from each plant and start winding them up the wire, following the X shape. The vines coming off that bottom eyebolt should go in two directions: one up and left, the other up and right.
If your vines are being dramatic and won’t stay put, you can secure them with floral tape or even a soft rubber band. But mine stayed just fine with a little winding.
Repeat this for each plant — and that’s it!
The Payoff: A Living, Blooming Fence
Once everything is planted and trained, you’re done. (Cue the happy dance.)
Over time, your jasmine will keep winding its way up the wires, filling in those X patterns with glossy green leaves and the sweetest-smelling white blooms. Every time you walk by, you’ll feel like you’re in a fancy garden — and you did it all yourself.
Let me know if you try this in your yard!