

How to Wall Mount a Samsung Frame TV Like The Pros

Hey friend! 👋 So you’ve got your hands on the stunning Samsung Frame TV—hello, artwork that secretly turns into a big screen—and now it’s time to get that baby on the wall. Whether you’re dealing with drywall or concrete, studs or empty space, I’m going to walk you through every step of mounting it securely (and stylishly!) using the Slim Fit Wall Mount.
Ready? Grab your drill—and a buddy—and let’s do this! 💪
🛠 What You’ll Need
Here’s a quick checklist before we dive in:
Tools:
Optional: oscillating multi-tool, 2x6 bracer
Blanket or protected surface for laying your TV face-down
An extra set of hands (trust me, this part isn’t solo-friendly)
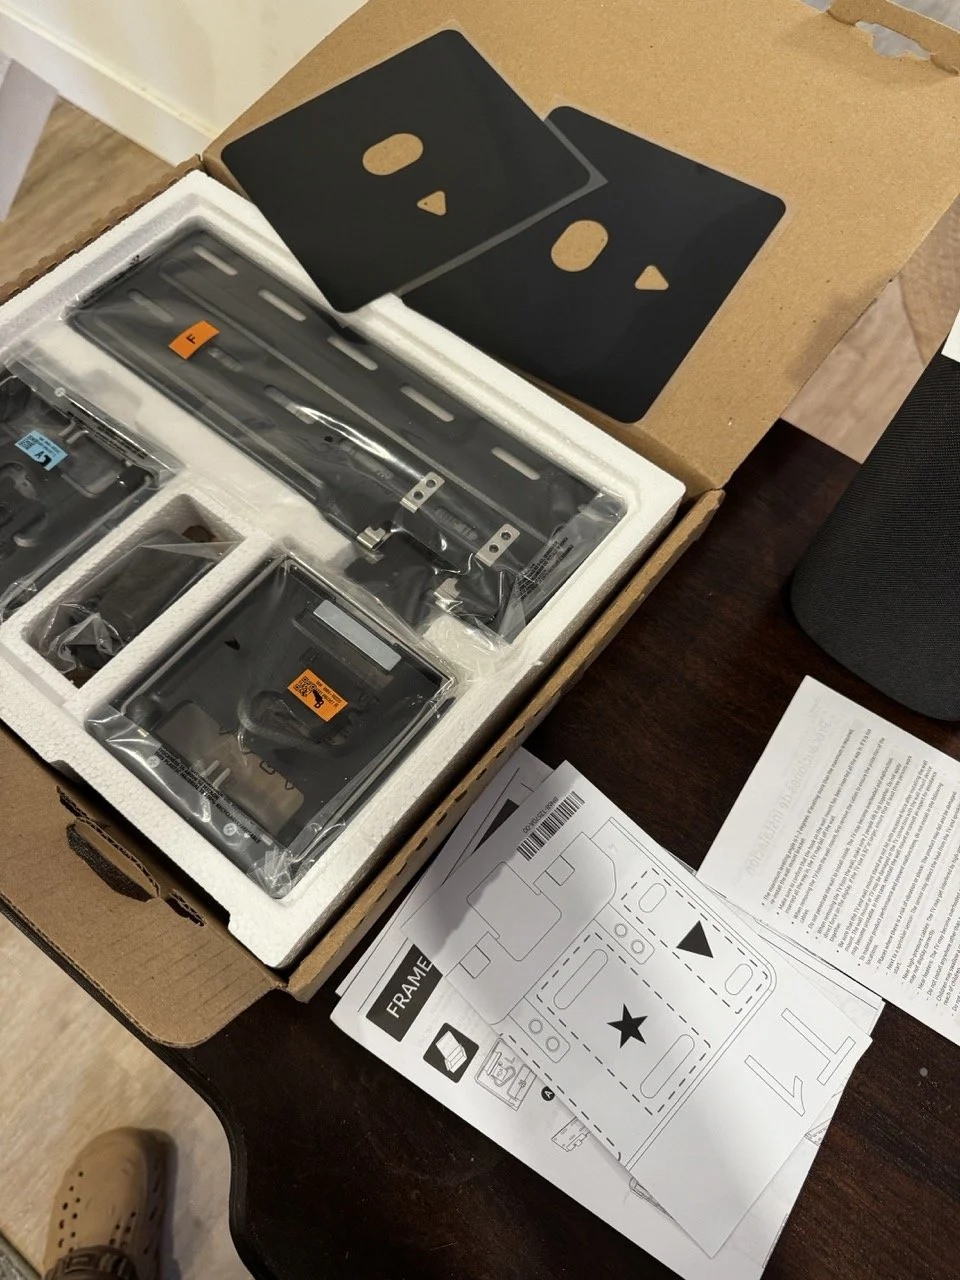
Hardware (should come in the box):
Wall mounting template
TV hanging brackets (marked L and R)
Wall plates + screws
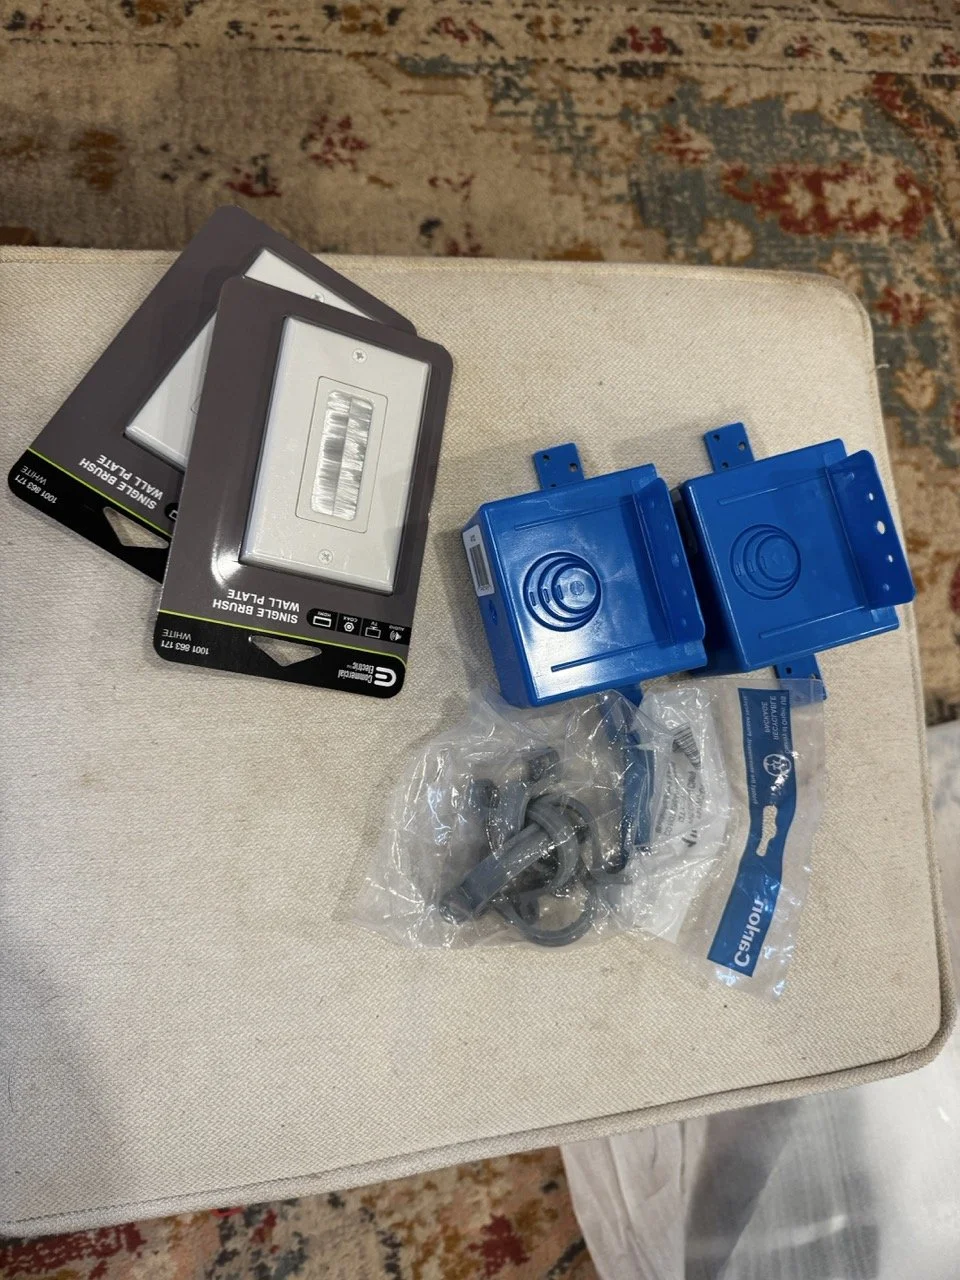
Protective stickers and pads
One Connect cable
Slim Fit Mount components
Step 1: Prep the TV (Gently!)
Lay the TV face down on a soft blanket. Do not press on the screen (ask me how I know 😅).
Stick the protective decals on the back top corners (arrows face inward).
Attach the left and right hanging brackets using the included screws and washers. They’re labeled L and R to keep it simple.
Pull the brackets out so they’re in the extended position.
Add the protective pads near the bottom back of the TV.


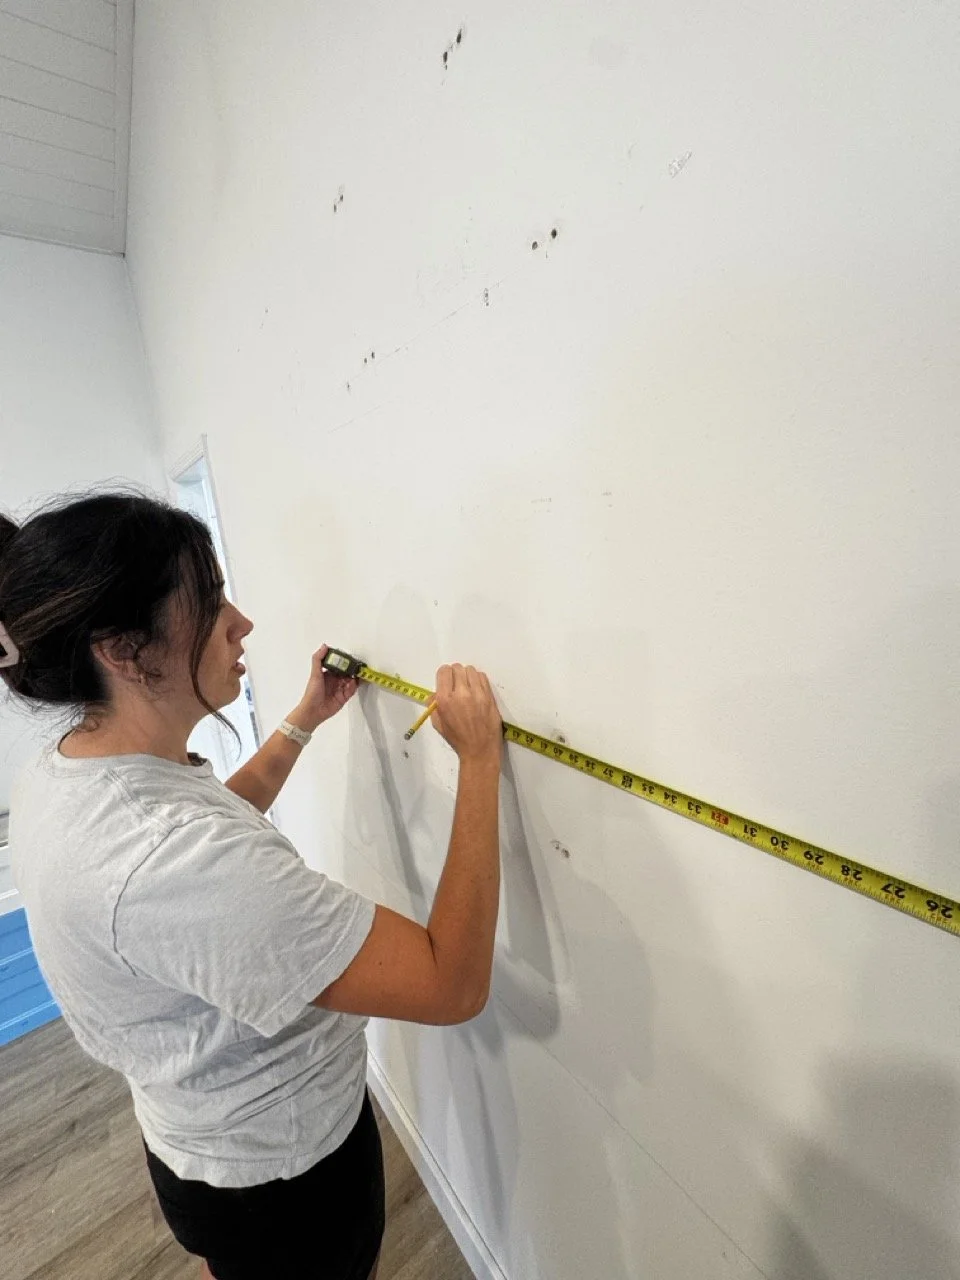
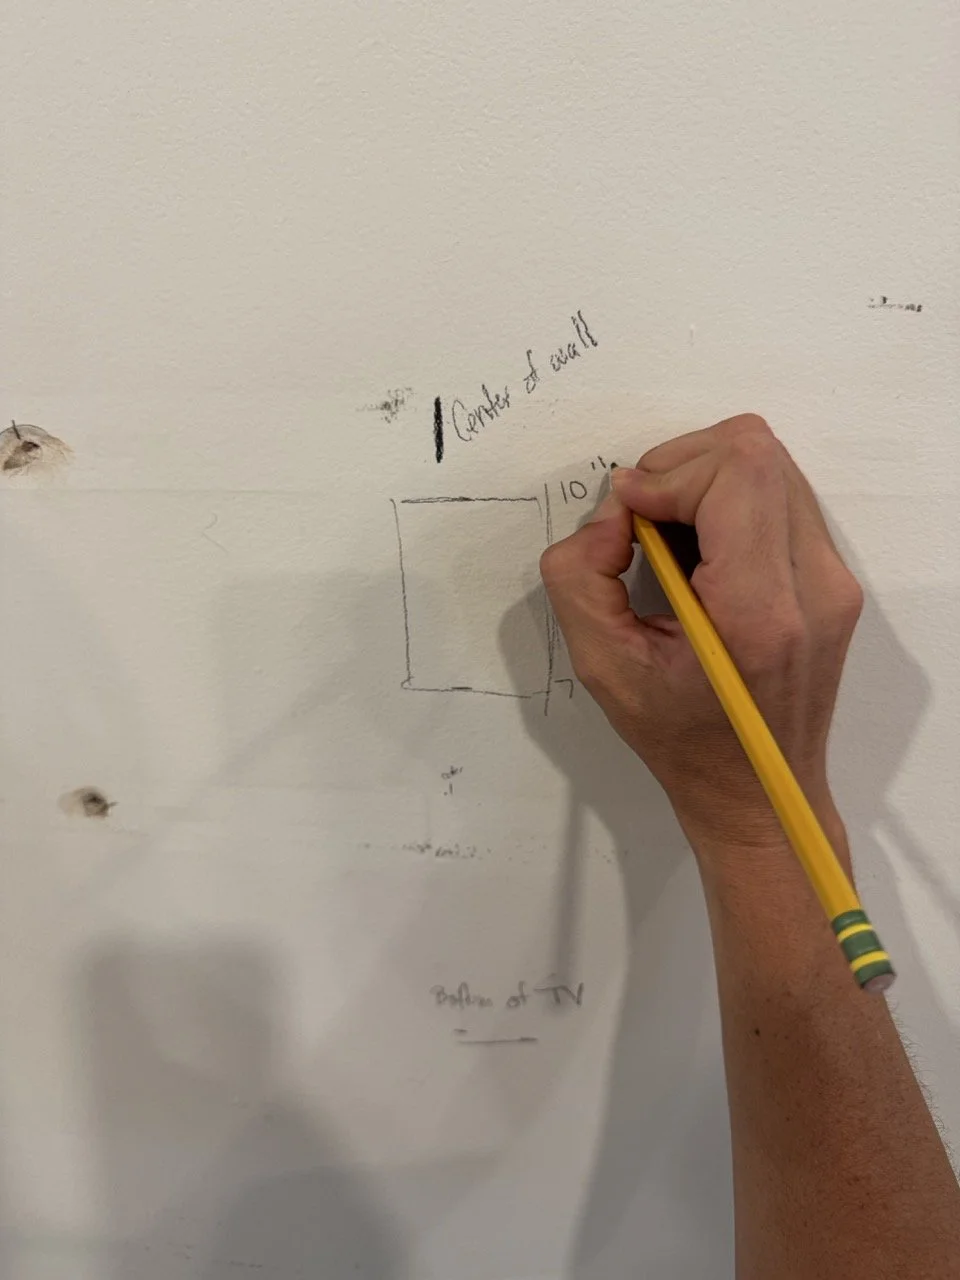
Step 2: Pick the Perfect Height
Mounting at eye level is key for comfy viewing. The general rule? Place the center of the TV about 42 inches from the floor—great for folks around 5’6” sitting on a standard couch.
You can also:
Sit in your usual spot and measure eye level
Use painter’s tape to outline the TV on the wall to visualize it
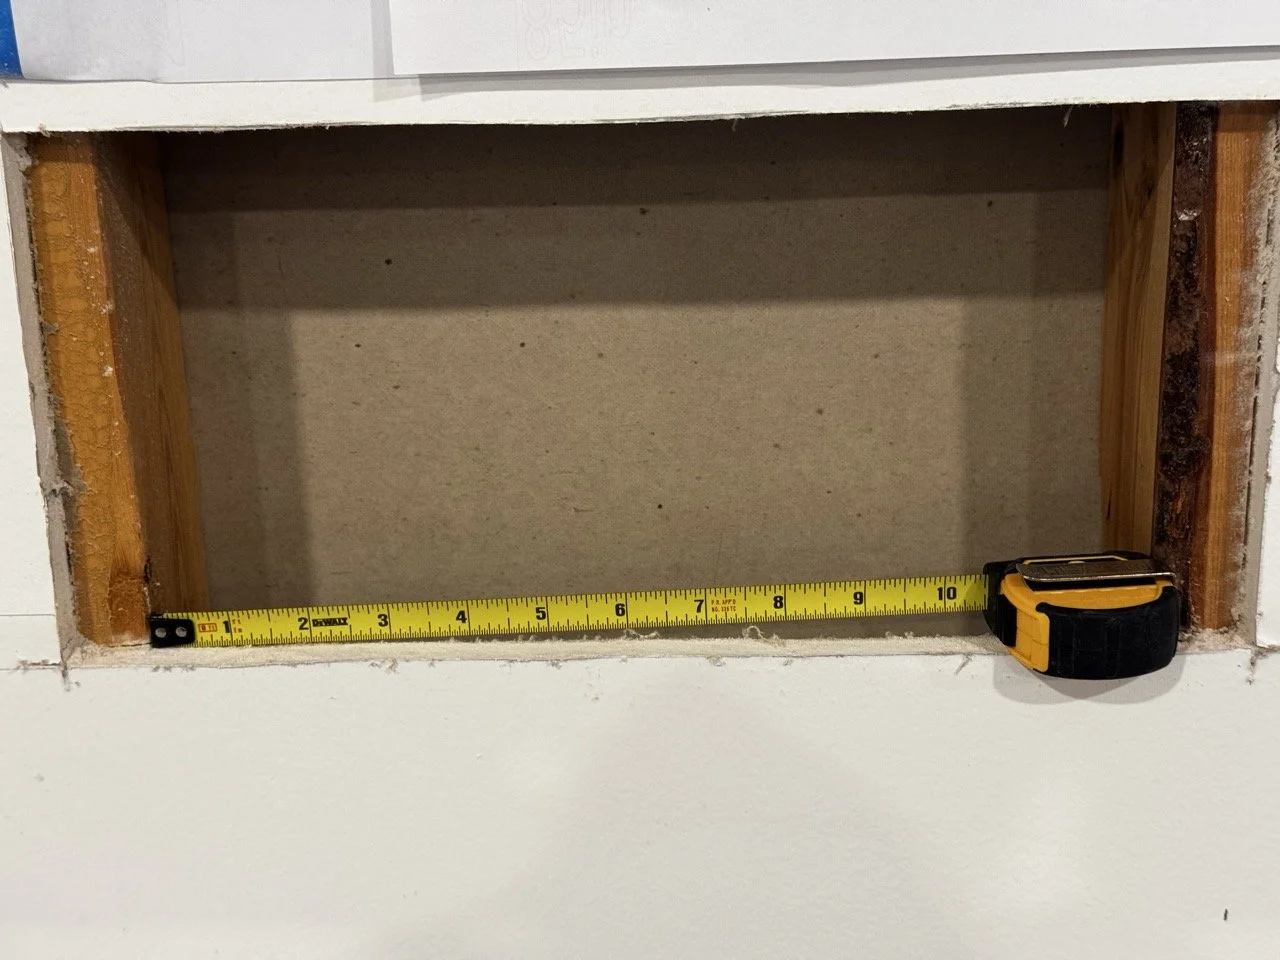
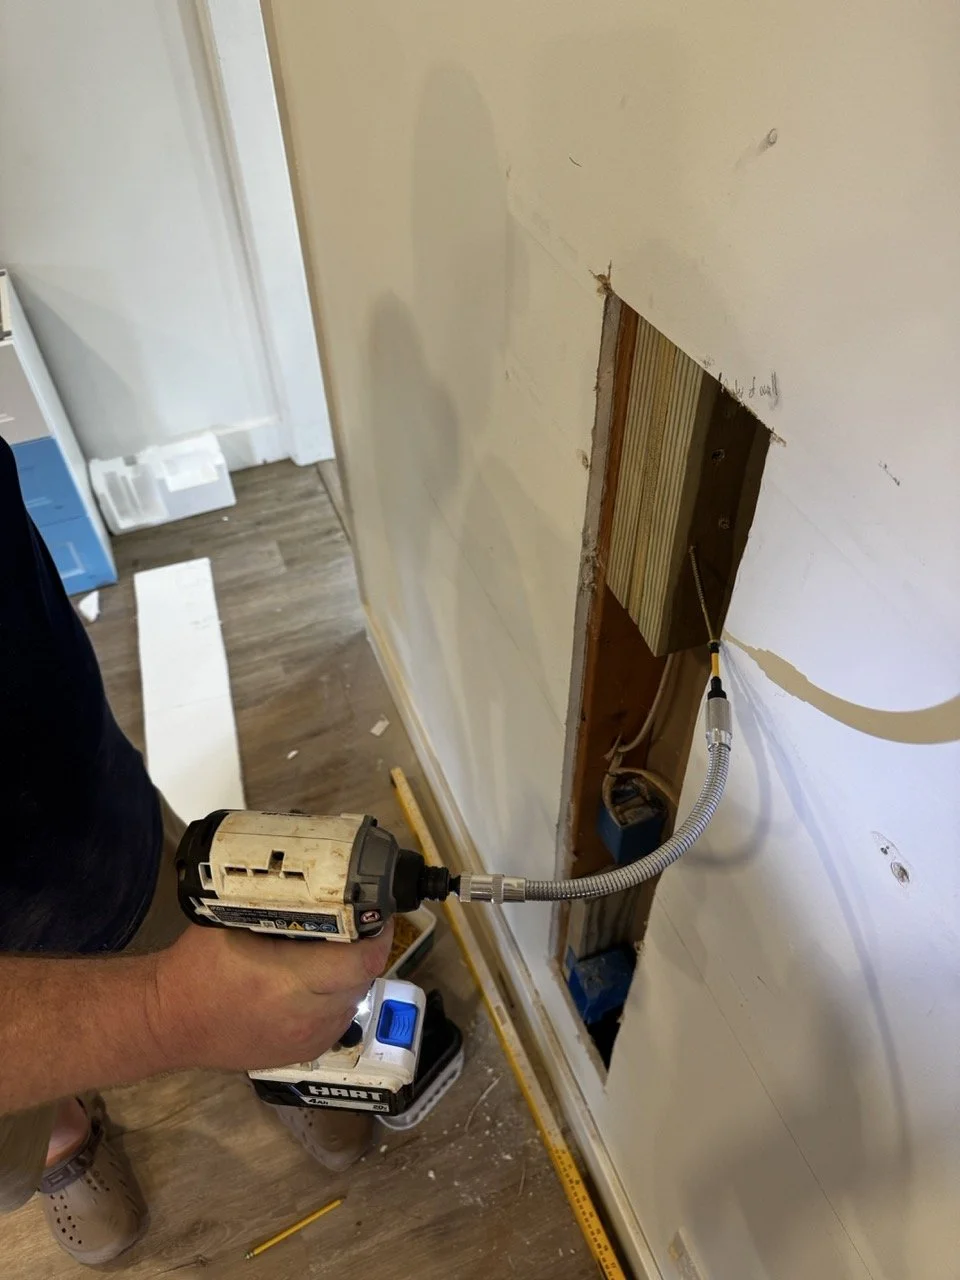
Step 3: Locate the Studs (or Prep for a Hollow Wall)
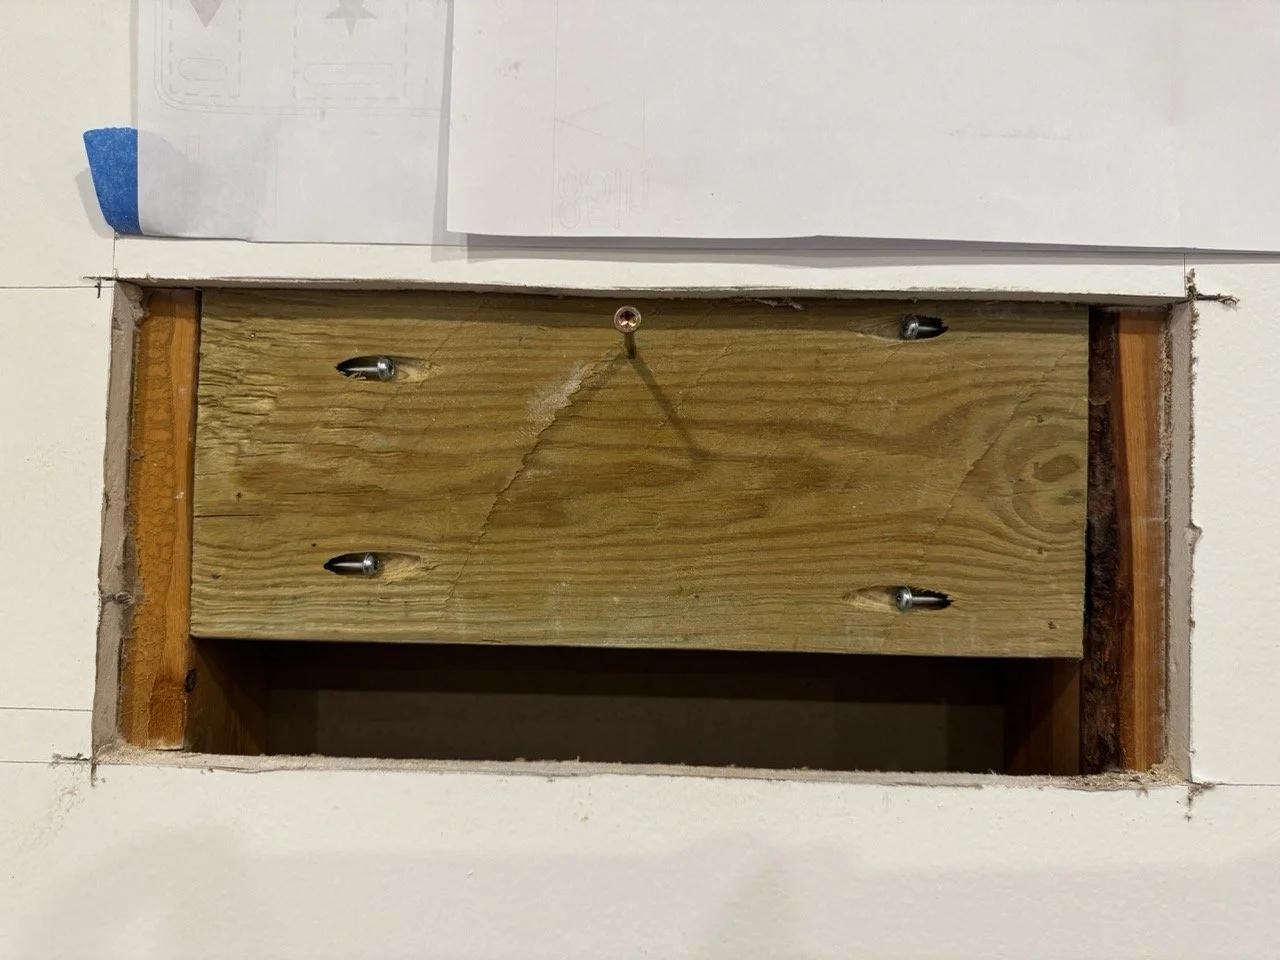
Use a stud finder to locate studs where the mount will go. Mark the stud locations with a pencil. If you’re mounting into drywall without a stud, you’ll need toggle bolts (they hold up to 100 lbs each!).
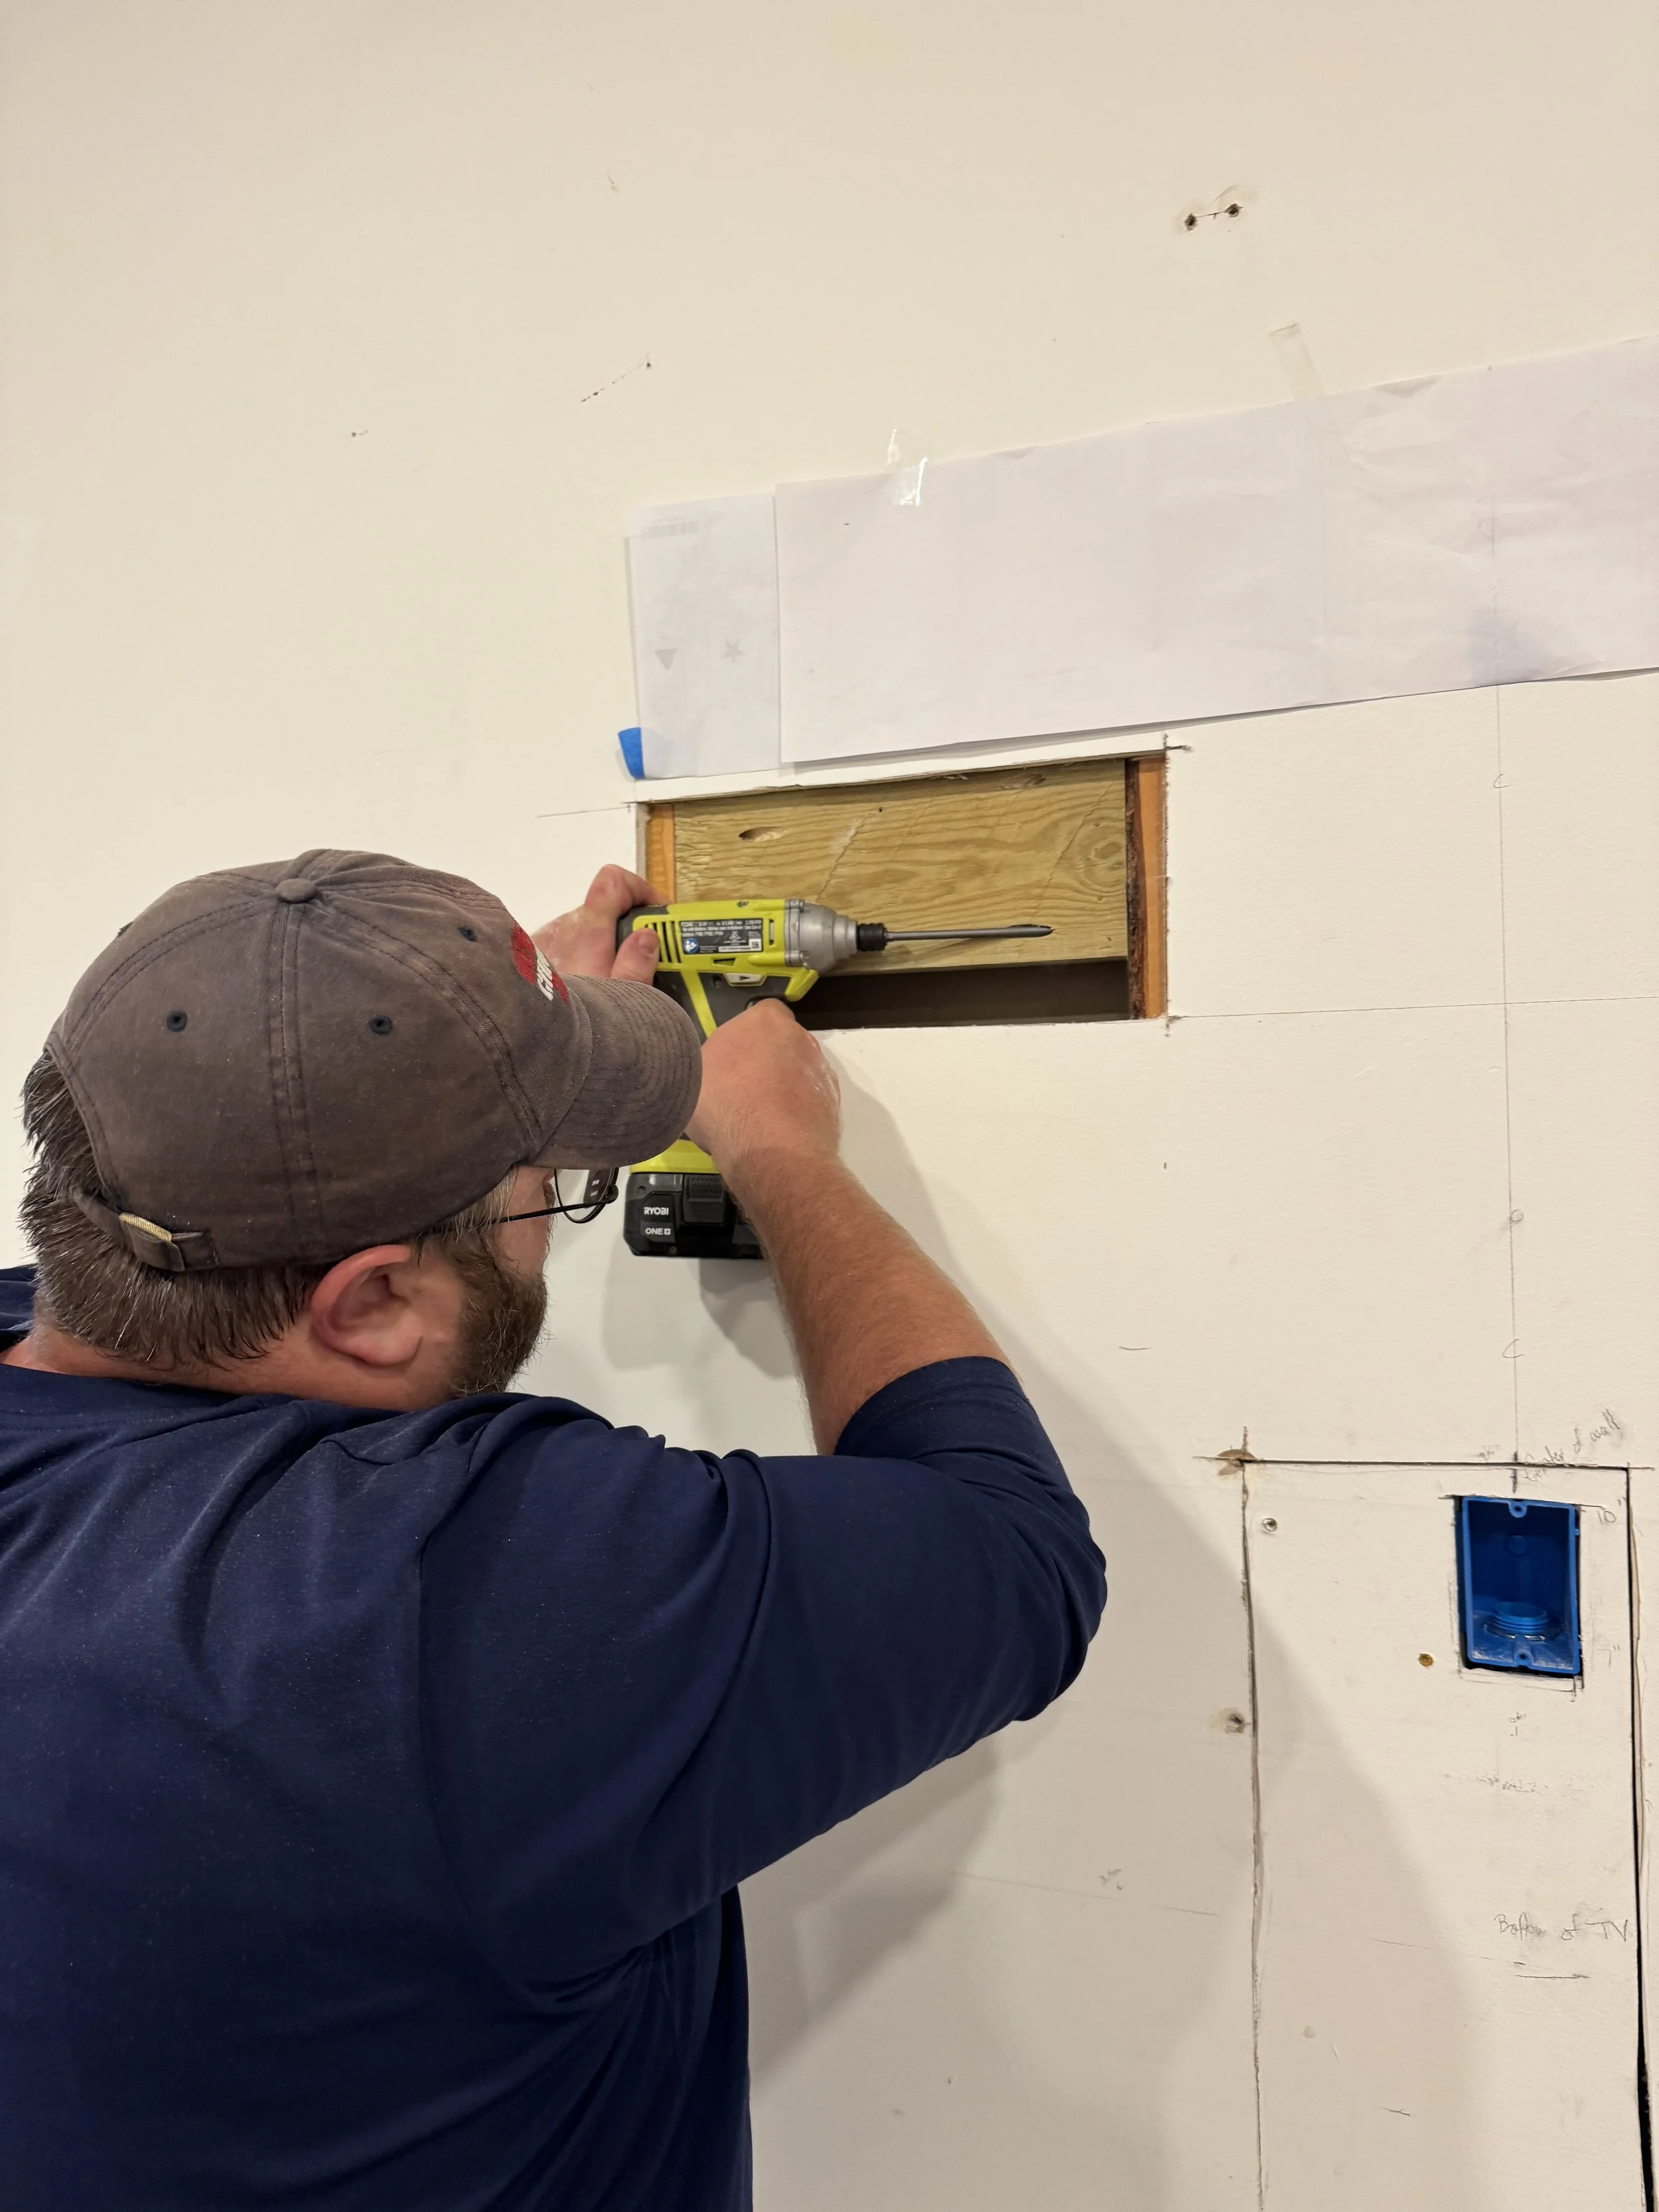
👷♂️ Pro tip from Tim: He didn’t trust toggle bolts alone, so he opened the wall, added a 2x6 brace between studs, and I patched it back up (since I had to patch the ENT section back up as well).
Step 4: Use the Mounting Template
Samsung includes a super handy template:
Match Template 1 to your TV size on Template 2.
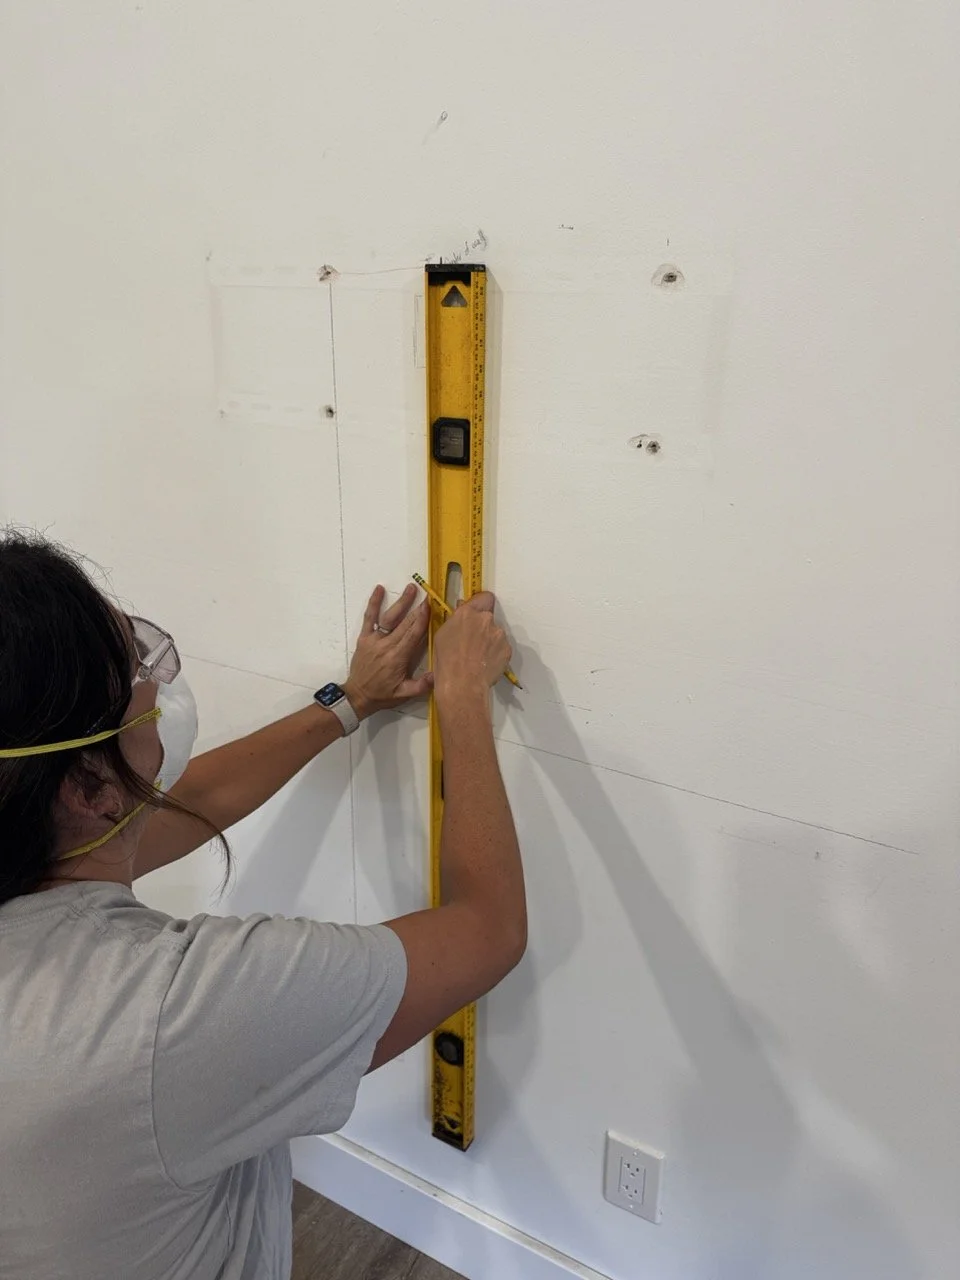
Tape it to the wall where you want to mount the TV. Double-check that it’s level.
Mark your drill holes (aim for four pilot holes per bracket).
Drill holes based on your wall type (drywall, brick, tile, etc.).
Step 5: Install the Wall Brackets
Attach each bracket using appropriate screws. If you’re in a stud—wood screws work great. No stud? Use toggle bolts or anchor hardware.
Only loosely tighten the screws at first.
Level again (always level!) and then fully tighten.
Measure the distance between the plates to match your TV’s bracket distance. (One user measured 30.5" between the mounts for a 65” Frame.)
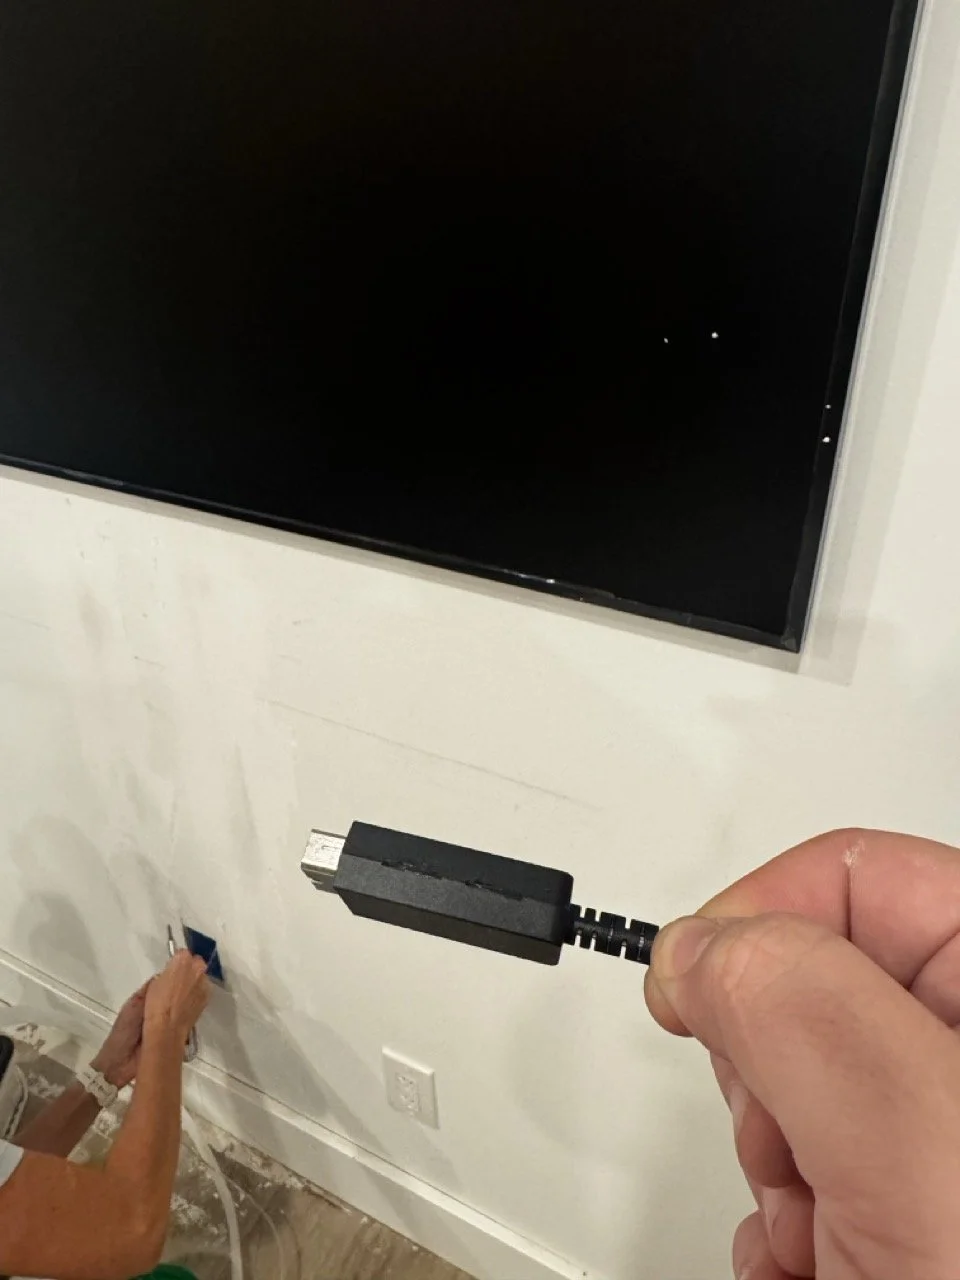
Step 6: Plan for the One Connect Cable
Samsung Frame uses a One Connect Box that powers and connects all your devices. The cable is delicate and not rated to go directly in the wall.
Here is the safest (and up to code) option:
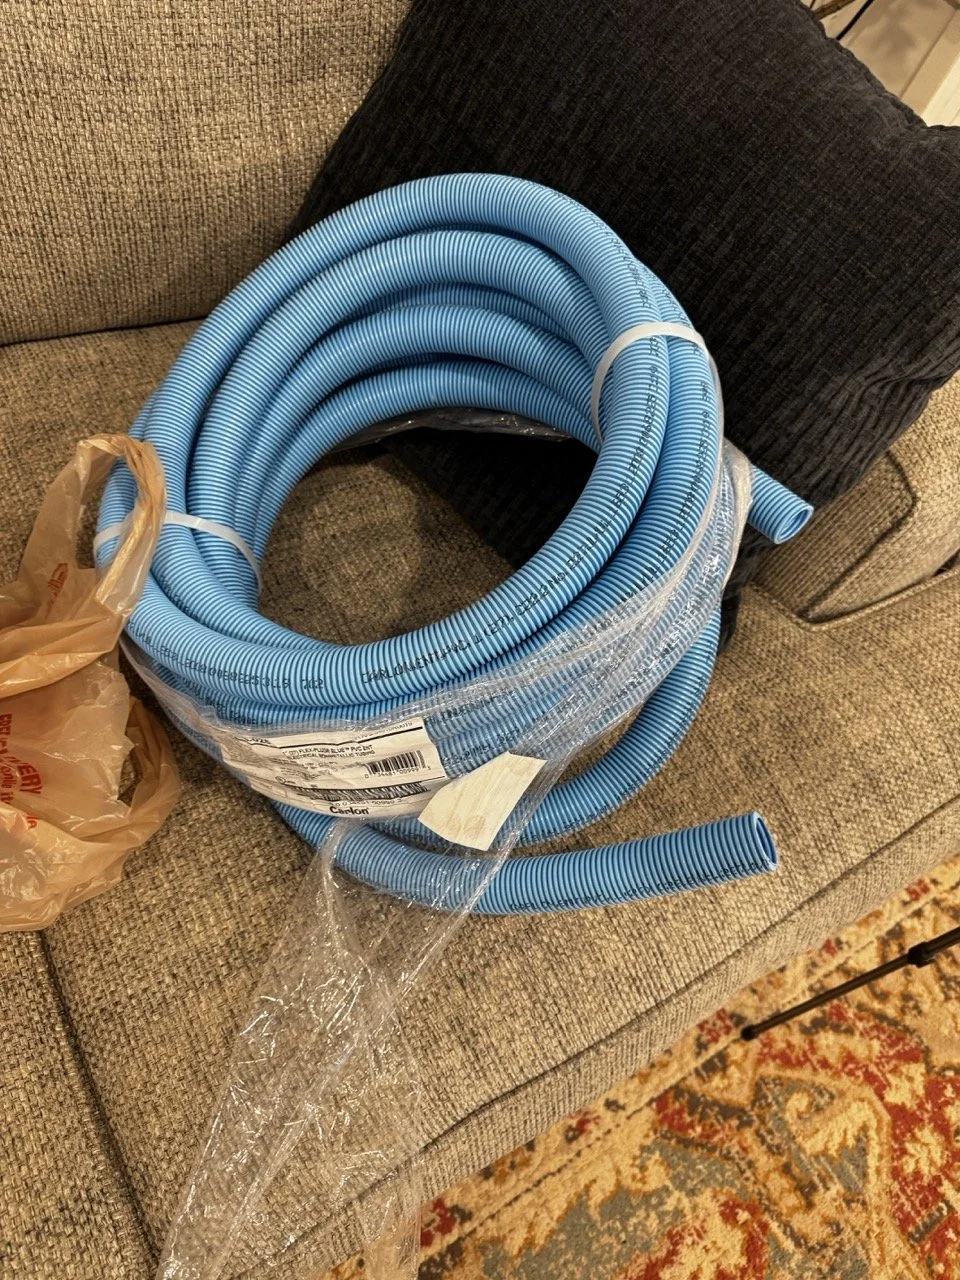
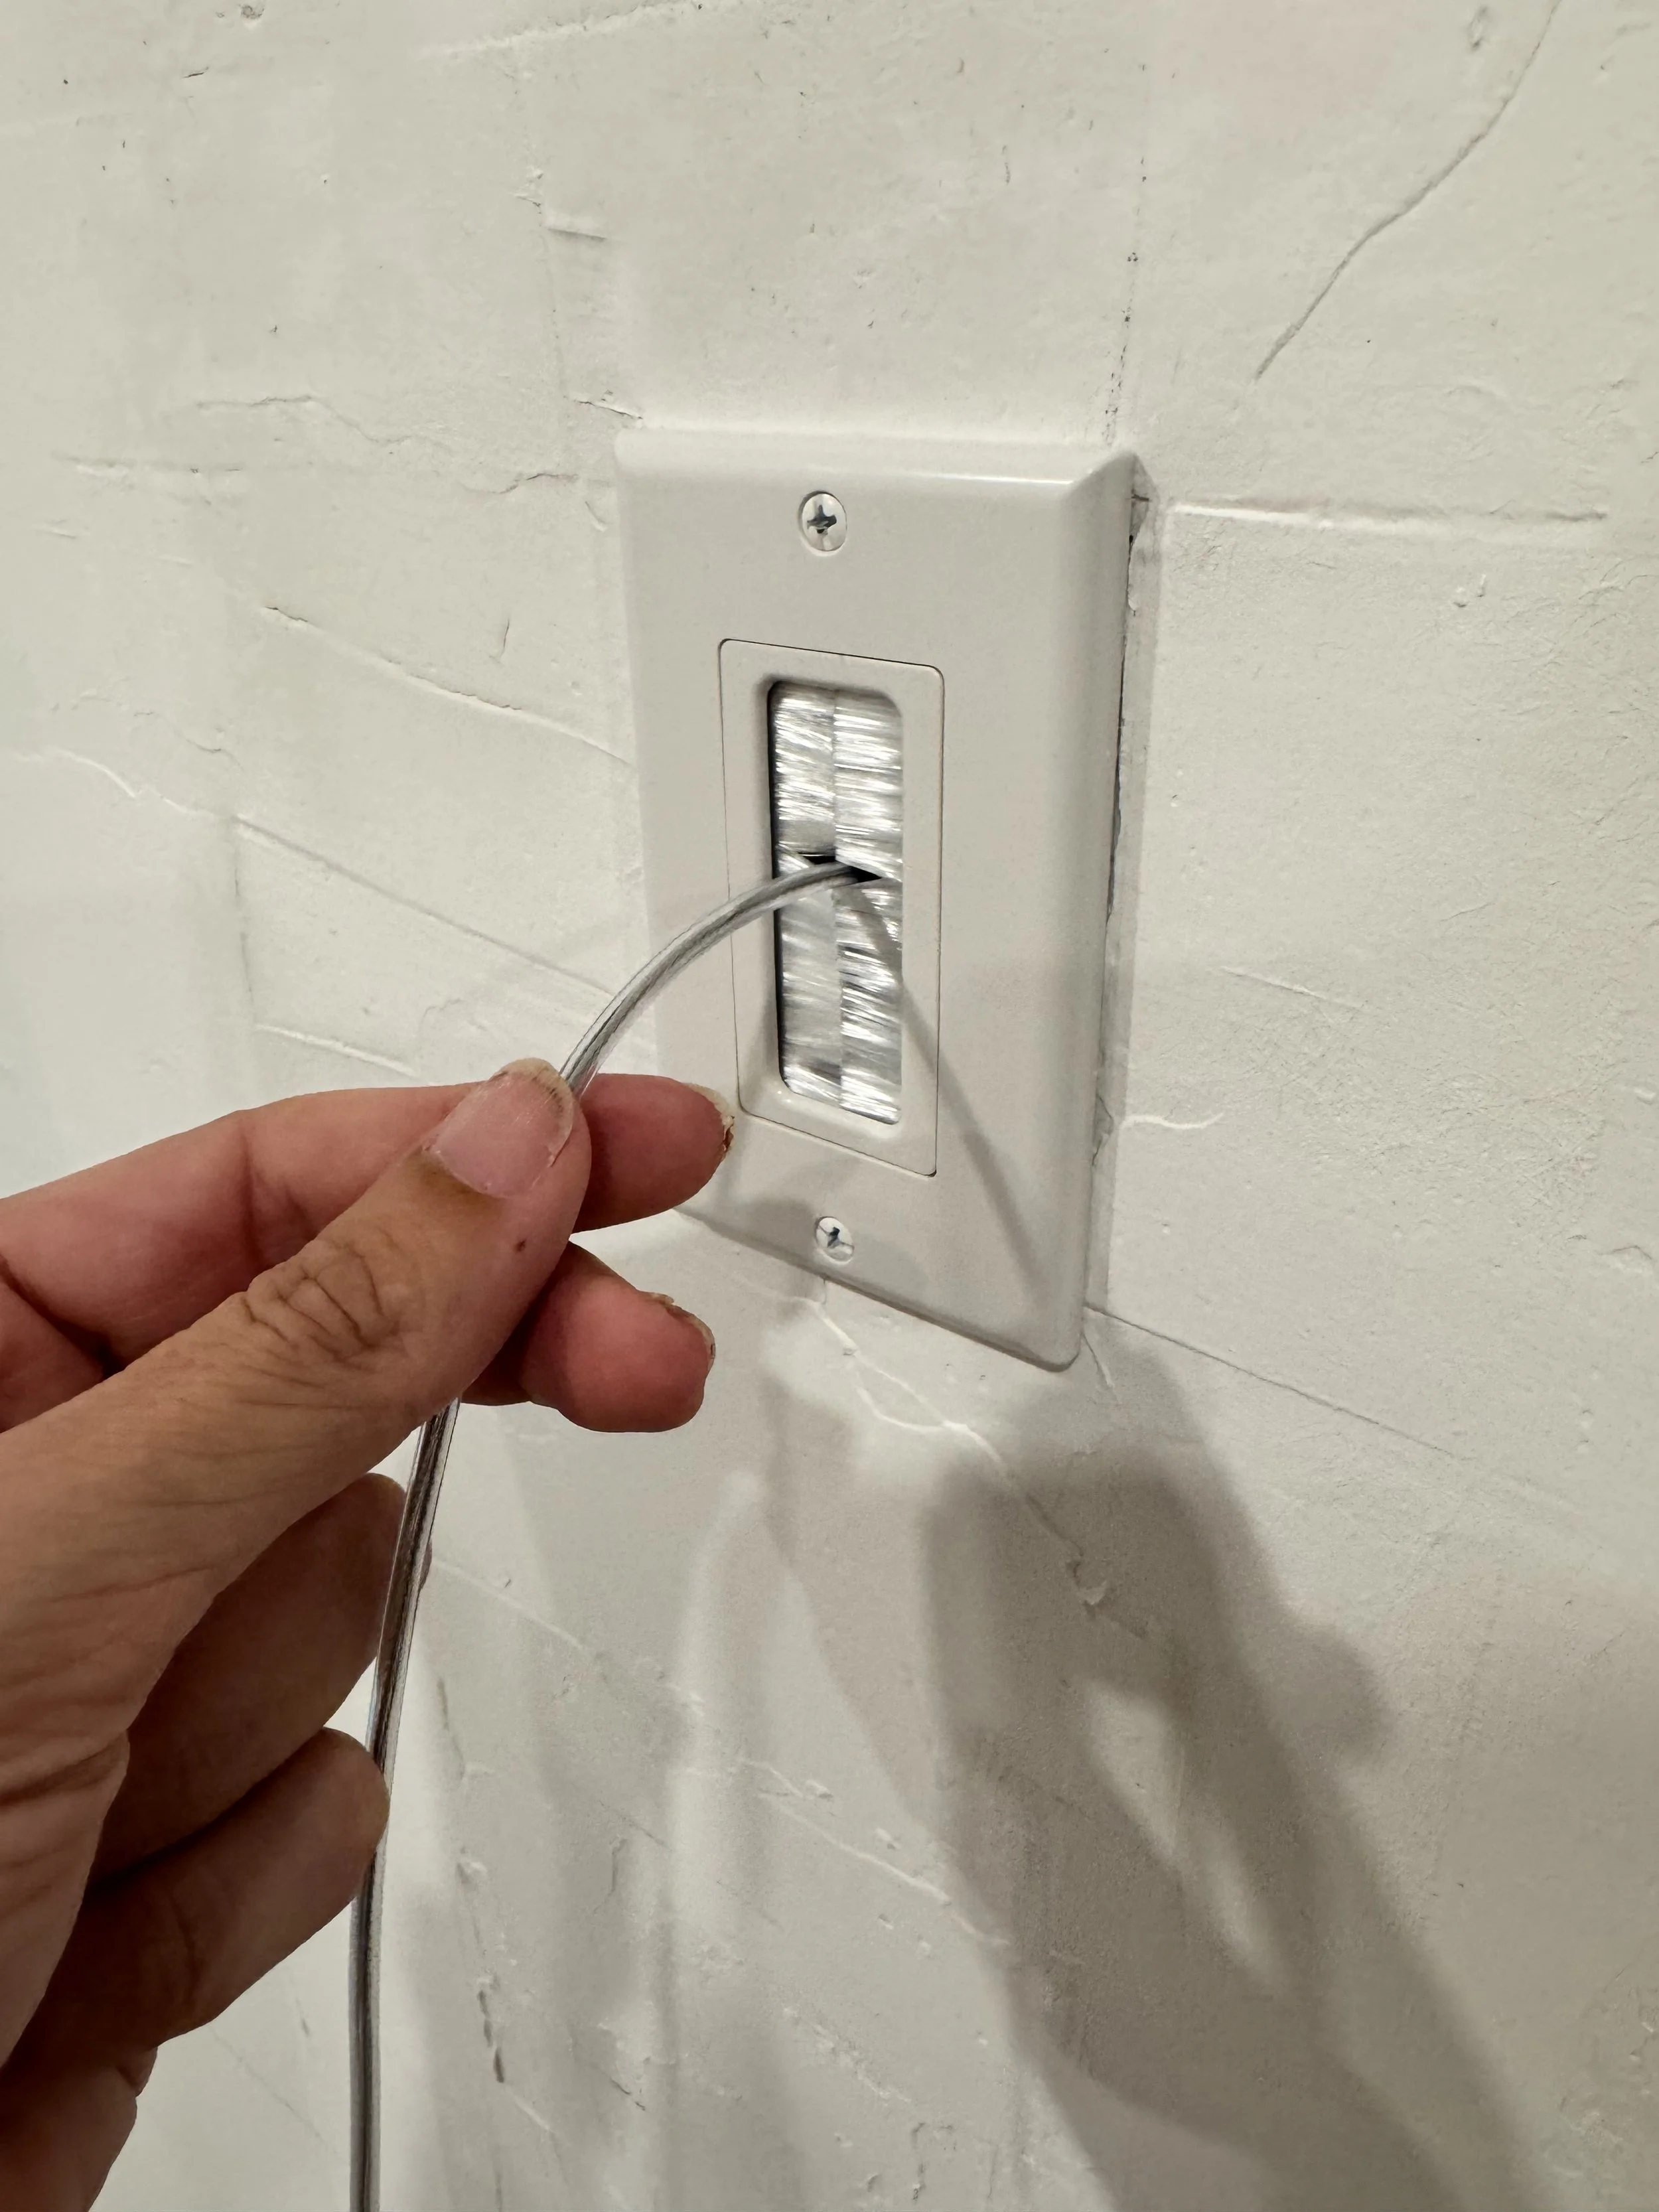
Use Electrical Non-Metallic Tubing (ENT) as a conduit for code-compliance. You’ll need 1" ENT to fit the larger port (the one that connects to the One Connect Box) through.
Use brush wall plates to conceal the cord coming from the 1 gang ent boxes.
If you ever want to add Romex wiring later for a hidden outlet, ENT makes that WAY easy too!
We removed a long strip of drywall that exposed the nearest stud to where we wanted to mount the ENT boxes and have the One Connect Cable come from the box to the TV. This helped as we wanted to add blocking to get the brush wall plate as close to center of the TV as possible. You certainly don’t have to be that picky and can leave the box on the stud closest to the center and remove less drywall than I did, but I’m ALWAYS thinking ahead!
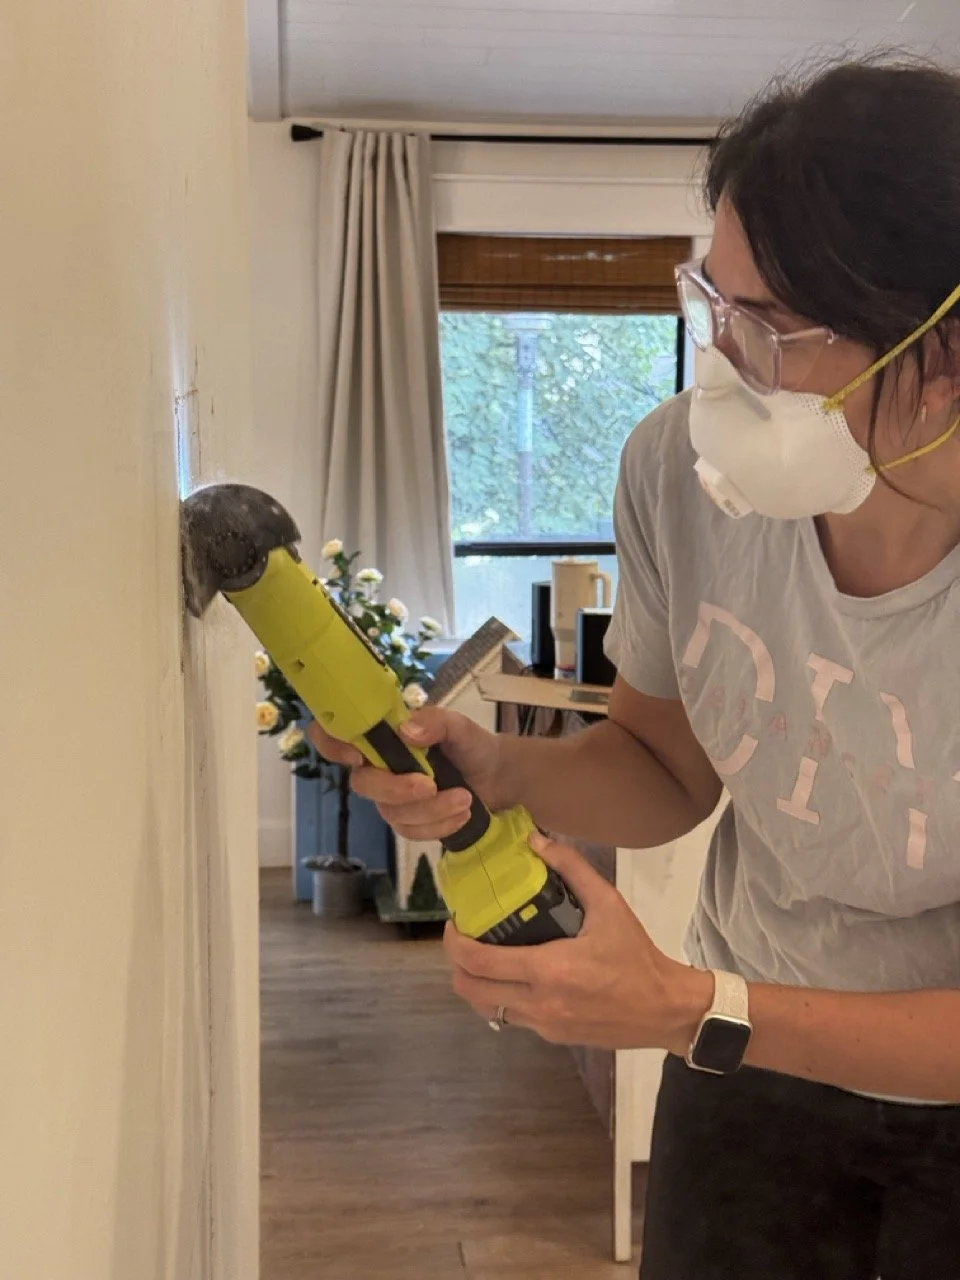
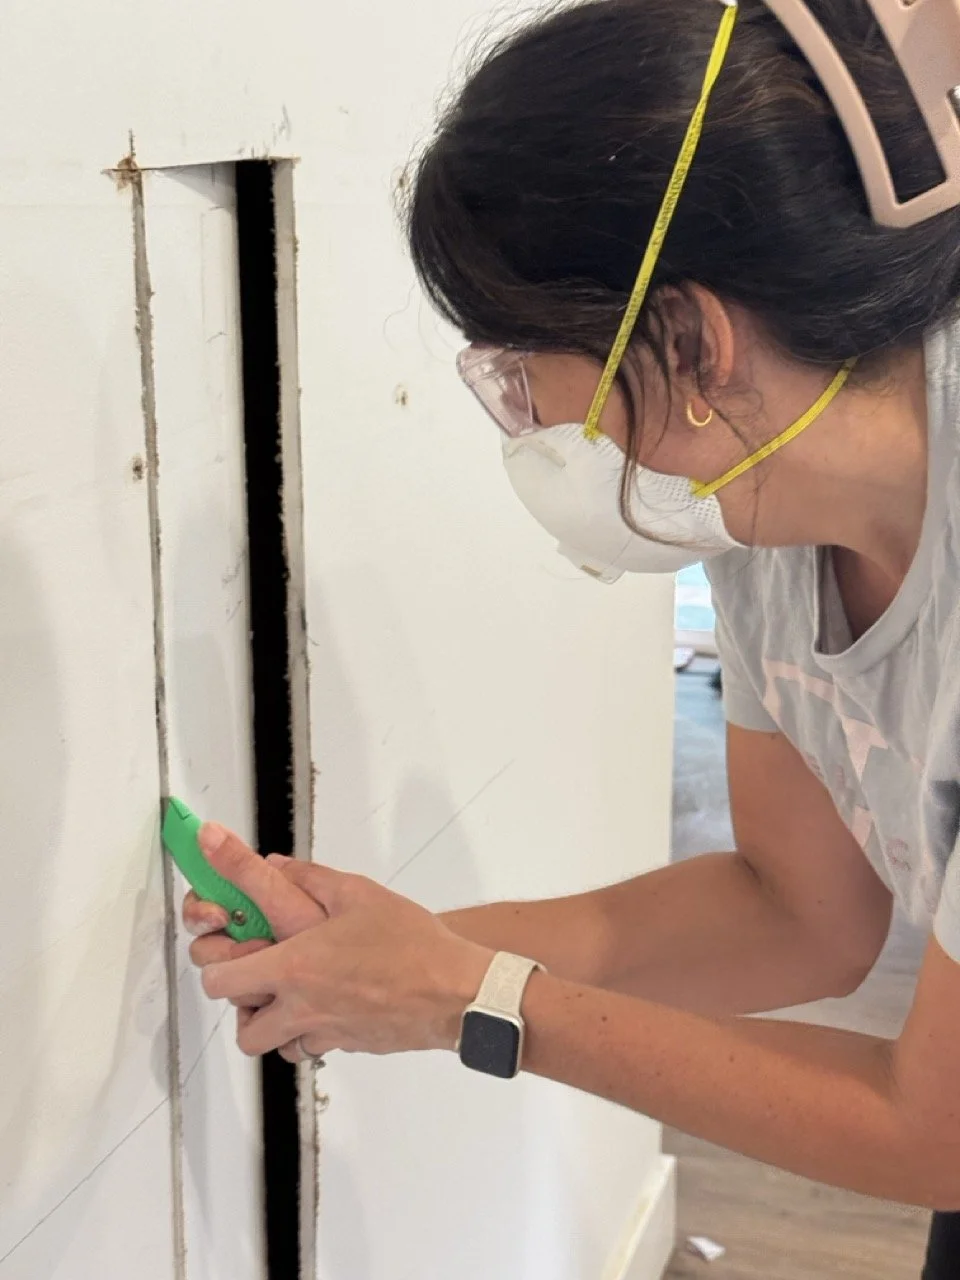
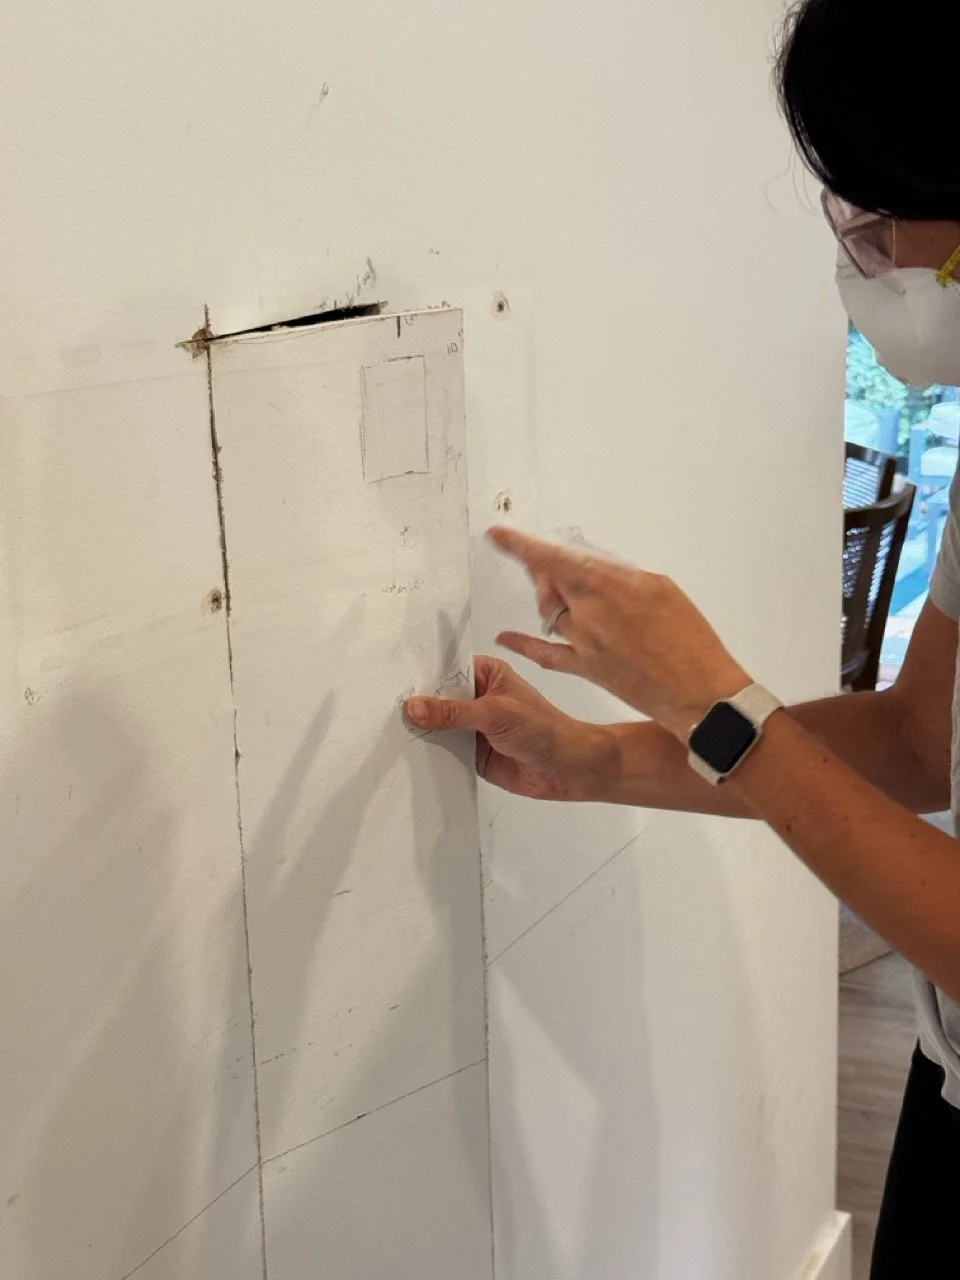


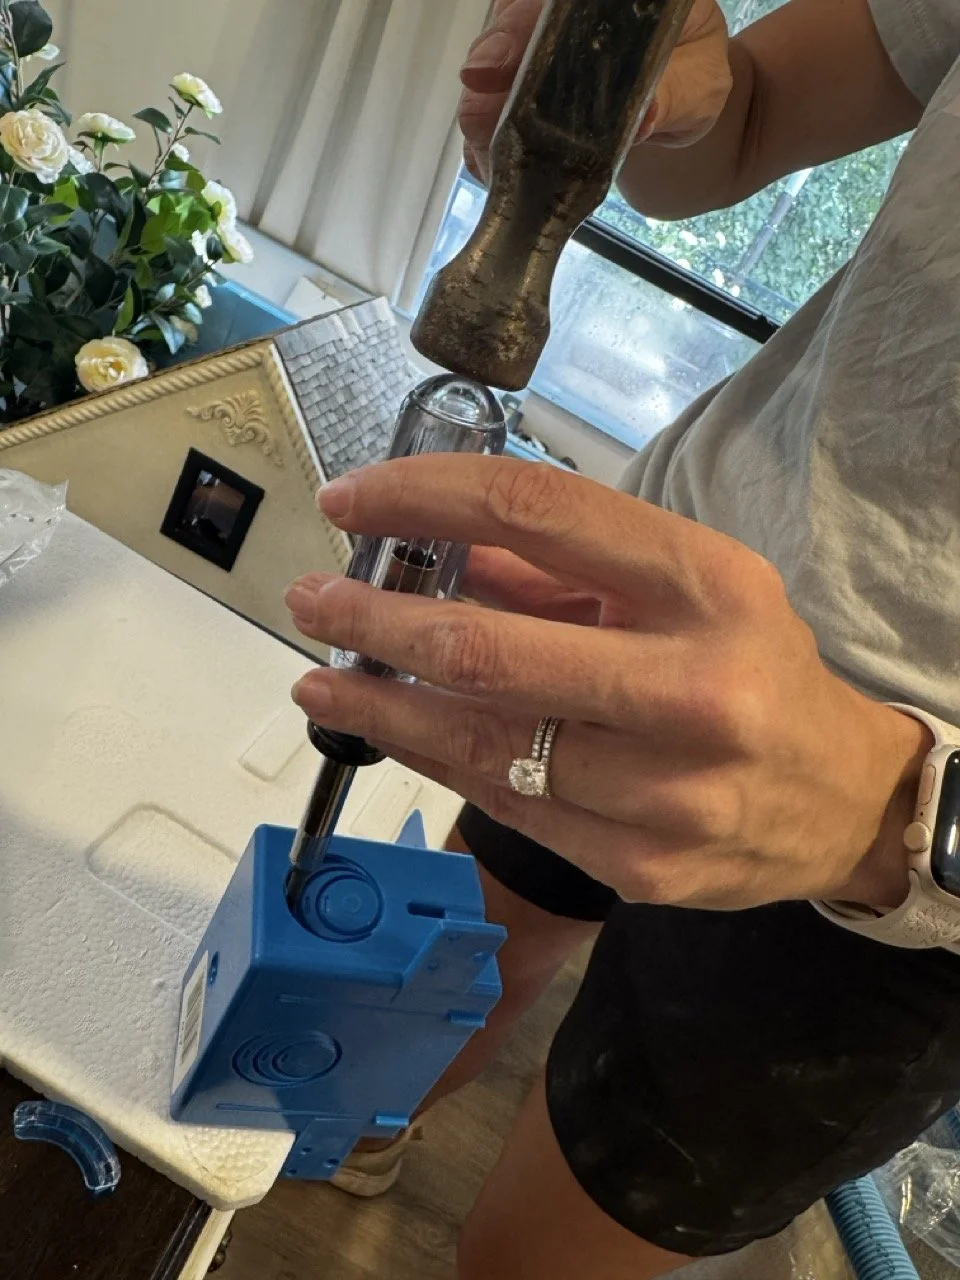

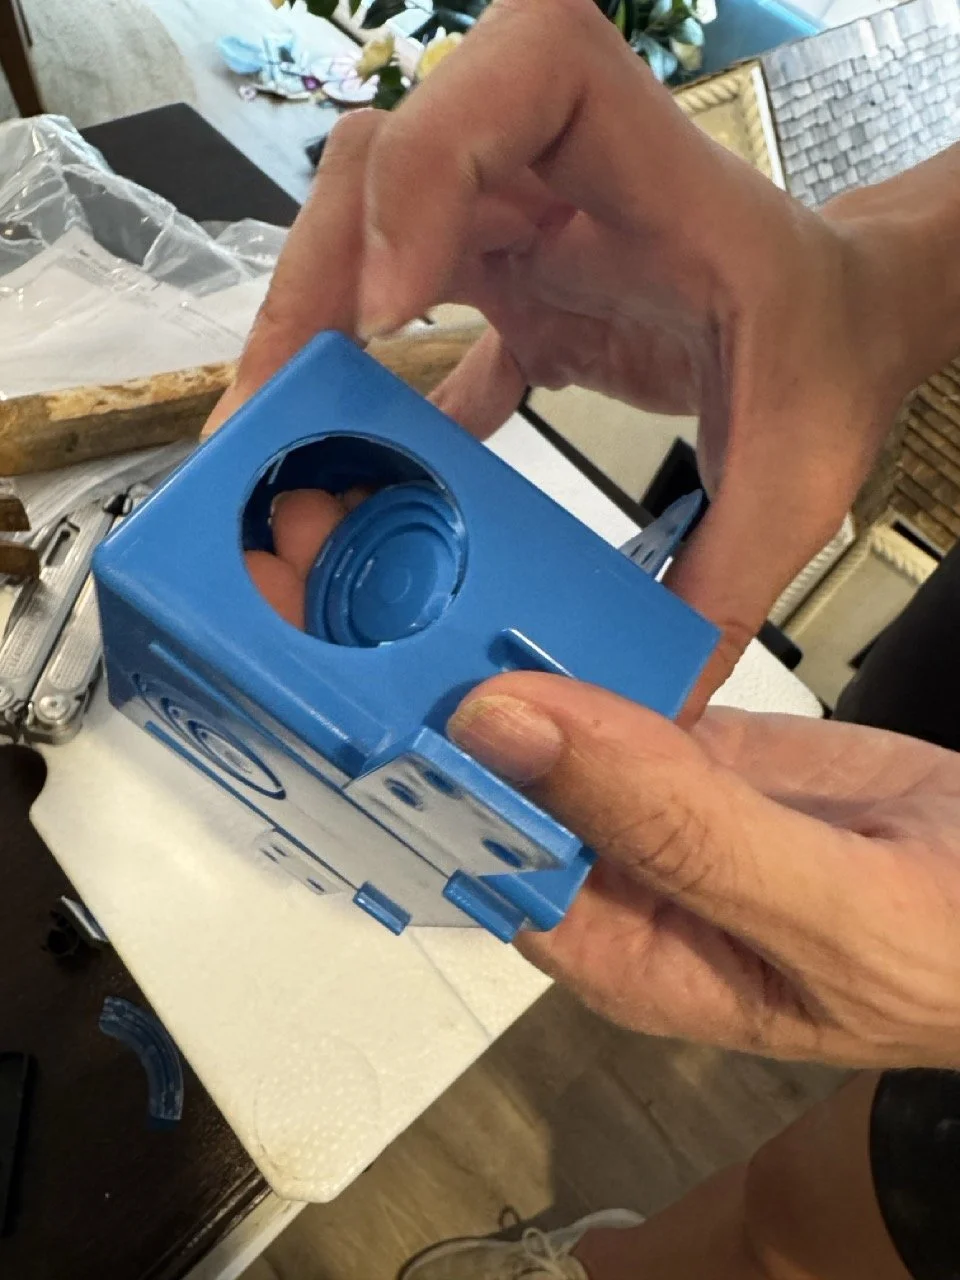

After installing the ENT conduit and connecting them to the ENT boxes (and after a few minutes of patch-work to repair the drywall), it was time to fish the wire through and install the brush wall plates.


Step 7: Connect the Cable + Hang the TV 🎉
Plug the One Connect cable into the back of the TV (keep the protective cap on until you're ready—this cable is fragile).
With a friend, carefully lift the TV by the sides and bottom—not the screen.
Gently hang it onto the wall mounts.
Push the TV toward the wall to get that tight, Slim Fit finish.
Level once more. Step back. Breathe it in. 😍
Step 8: Hook Up the One Connect Box
Plug in your power, HDMI devices, streaming stick, or that dusty old Blu-ray player. The One Connect Box keeps everything neat and hidden.

Final Thoughts
Mounting The Frame might feel intimidating at first, but once you break it down—step by step—it’s totally doable, even for beginners. And when you're done? You’ll have a piece of art on the wall that just so happens to be a jaw-dropping TV.
You've got this.
Stay tuned for what else I’ve been dreaming up for this wall….